
Overview
If the account cannot be found on the Account Search screen or Account Map, tap the Add New Account button to manually create a new account. Once created, the manually created account name will be marked by 2 asterisks (**) so that everyone in your organization knows this account was created by a user and is not part of ongoing account data ingestion.
**NOTE: Manually created accounts do not receive 3rd party sales data.
Mobile App
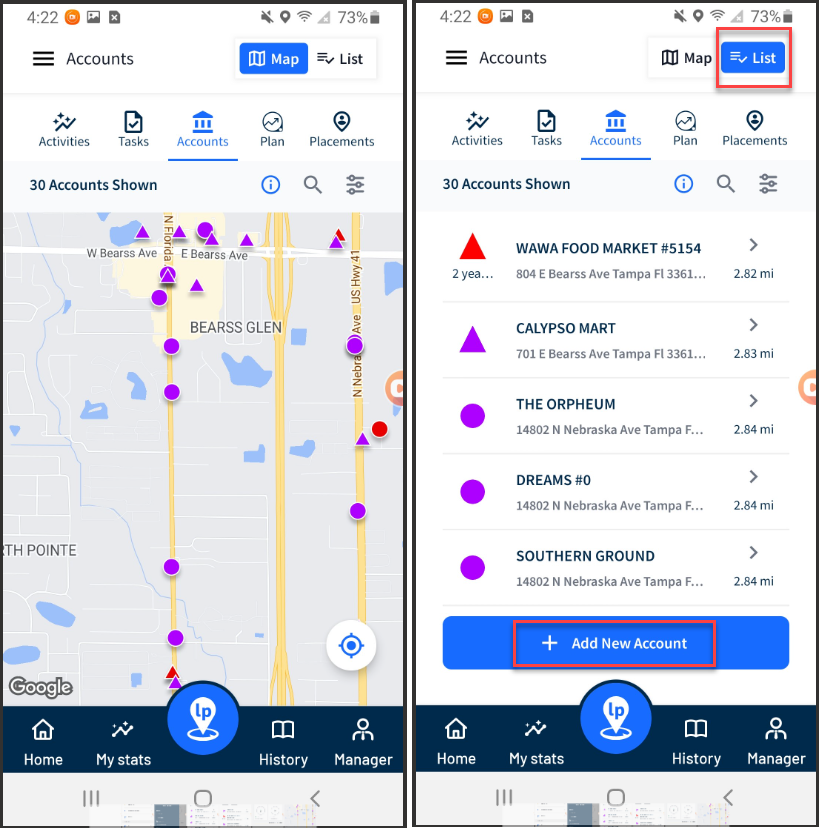
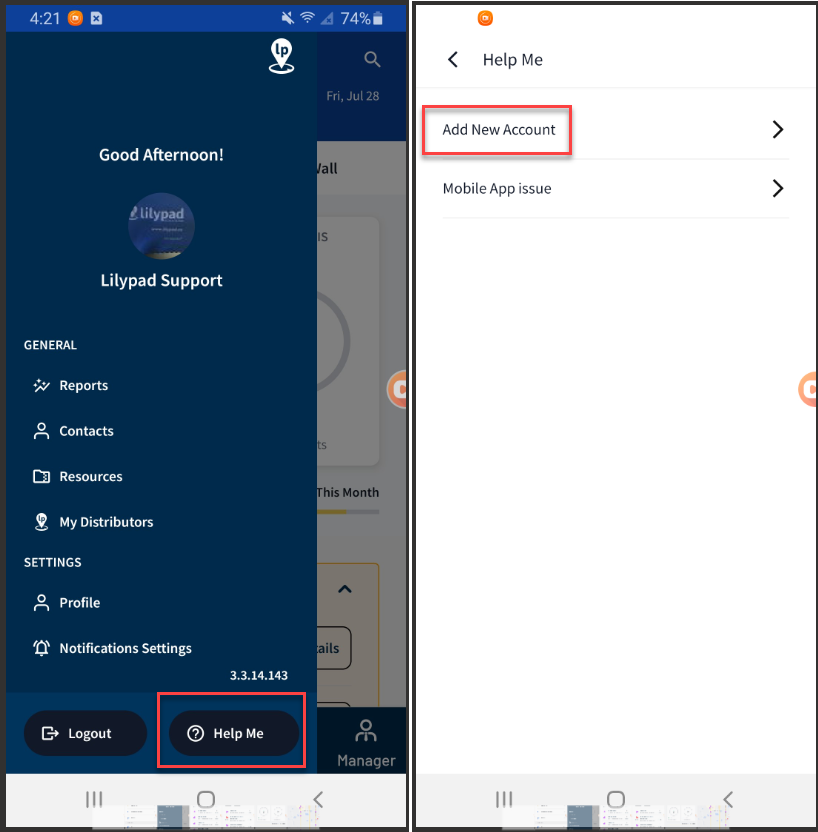
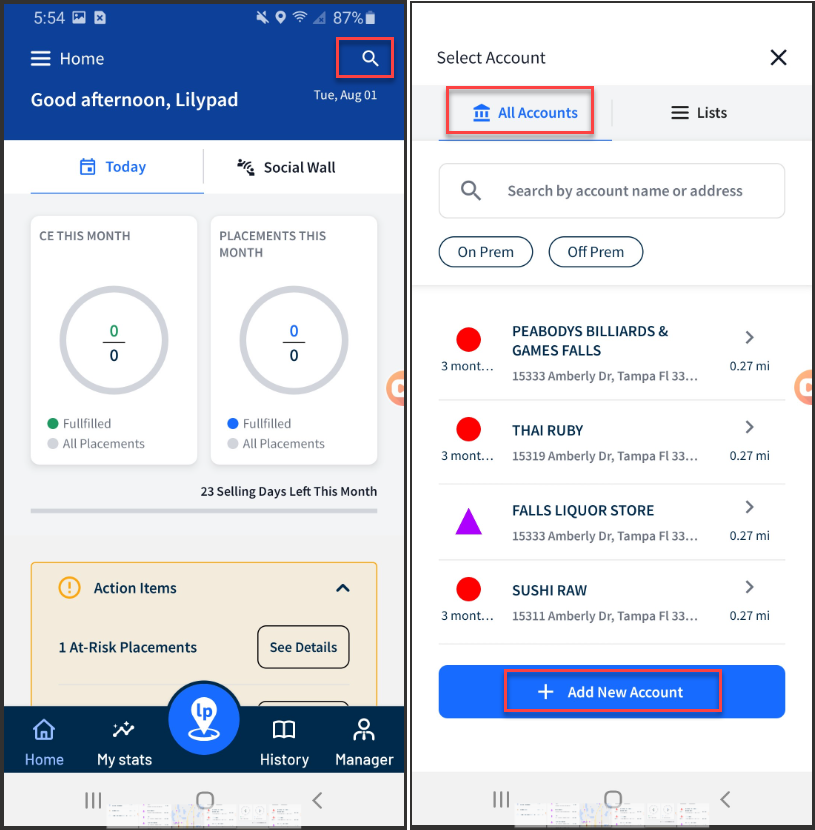
The Add New Account button can be found in the mobile app on any of the screens listed below. From here, you can manually create the account so that you can complete activities, tasks, and placements.
- Blue Pushpin > Start an activity/task that requires the user to choose an account > bottom of the Account Search screen.
- Blue Pushpin > Tasks > default Task called "Add New Account"
- Blue Pushpin > Start a placement > bottom of the Account Search screen.
- Blue Pushpin > Accounts > List view > at the bottom of the list of accounts.
- Side Menu > Help Me > Add New Account.
- Home > Account Search screen > at the bottom of the All Accounts tab.


**NOTE: Manually creating an account should only be done if the user is absolutely sure this account does not exist within an account universe that is currently selected under Side Menu > My Distributors.
- Click into the search field at the top of the screen and search for the account that you can't find in Lilypad. There are multiple ways you can search:
- Search by account name OR address.
- Search by account name AND address by putting a comma after the account name.
- example: Walmart Supercenter, 5010 n 95th ave
- As you enter account information, if the location exists in Google, it will start to populate potential matches beneath the search field. Up to 5 search returns will populate.
**NOTE: If an account cannot be found using its name, try searching the street number in the street address. This may also be necessary when searching for a location that is not nearby.
- Account Name found by Google - If an account is found by Google, it is not recommended to change the account name since this could pollute future account data. If you searched by account name at the top of the screen, then that account name will populate here. If you searched by street address and Google is unable to find the account, then the street address may appear in this field. Be sure to edit this to the proper account name before saving so that you can search by account name, not just by address, in Lilypad in the future.
- New Account Address - The address should automatically populate from the previous search screen.
- Distributor - Distributor options will populate based on what you have selected on your Side Menu > My Distributors page. You can select more than one if the account is serviced by multiple distributors.
-
Class Of Trade - options include the following:
- BAR
- CONCESSIONAIRE
- CONVENIENCE/GAS
- DRUG STORE
- FACTORY/OFFICE
- GENERAL MERCHANDISER
- GOVERNMENT/NON MILITARY
- HEALTH/HOSPITAL
- HOTEL/MOTEL
- LIQUOR/PACKAGE STORE
- MASS MERCH/SUPERCENTER
- MILITARY OFF PREMISE
- MILITARY ON PREMISE
- NON RETAIL ACCOUNT
- OTHER OFF PREMISE
- OTHER ON PREMISE
- RECREATION/ENTERTAINMENT
- RESTAURANT
- SCHOOL
- SMALL GROCERY STORE
- SPECIALTY RETAIL
- SUPERMARKET
- TRANSPORTATION
- UNASSIGNED
- WHOLESALE CLUB
- On/Off Premise - Select whether this new account is On or Off Premise.
- Save New Account button - After you've filled in the above fields, tap this button to save the new account.
**NOTE: A red asterisk (*) denotes a required field.

Web App
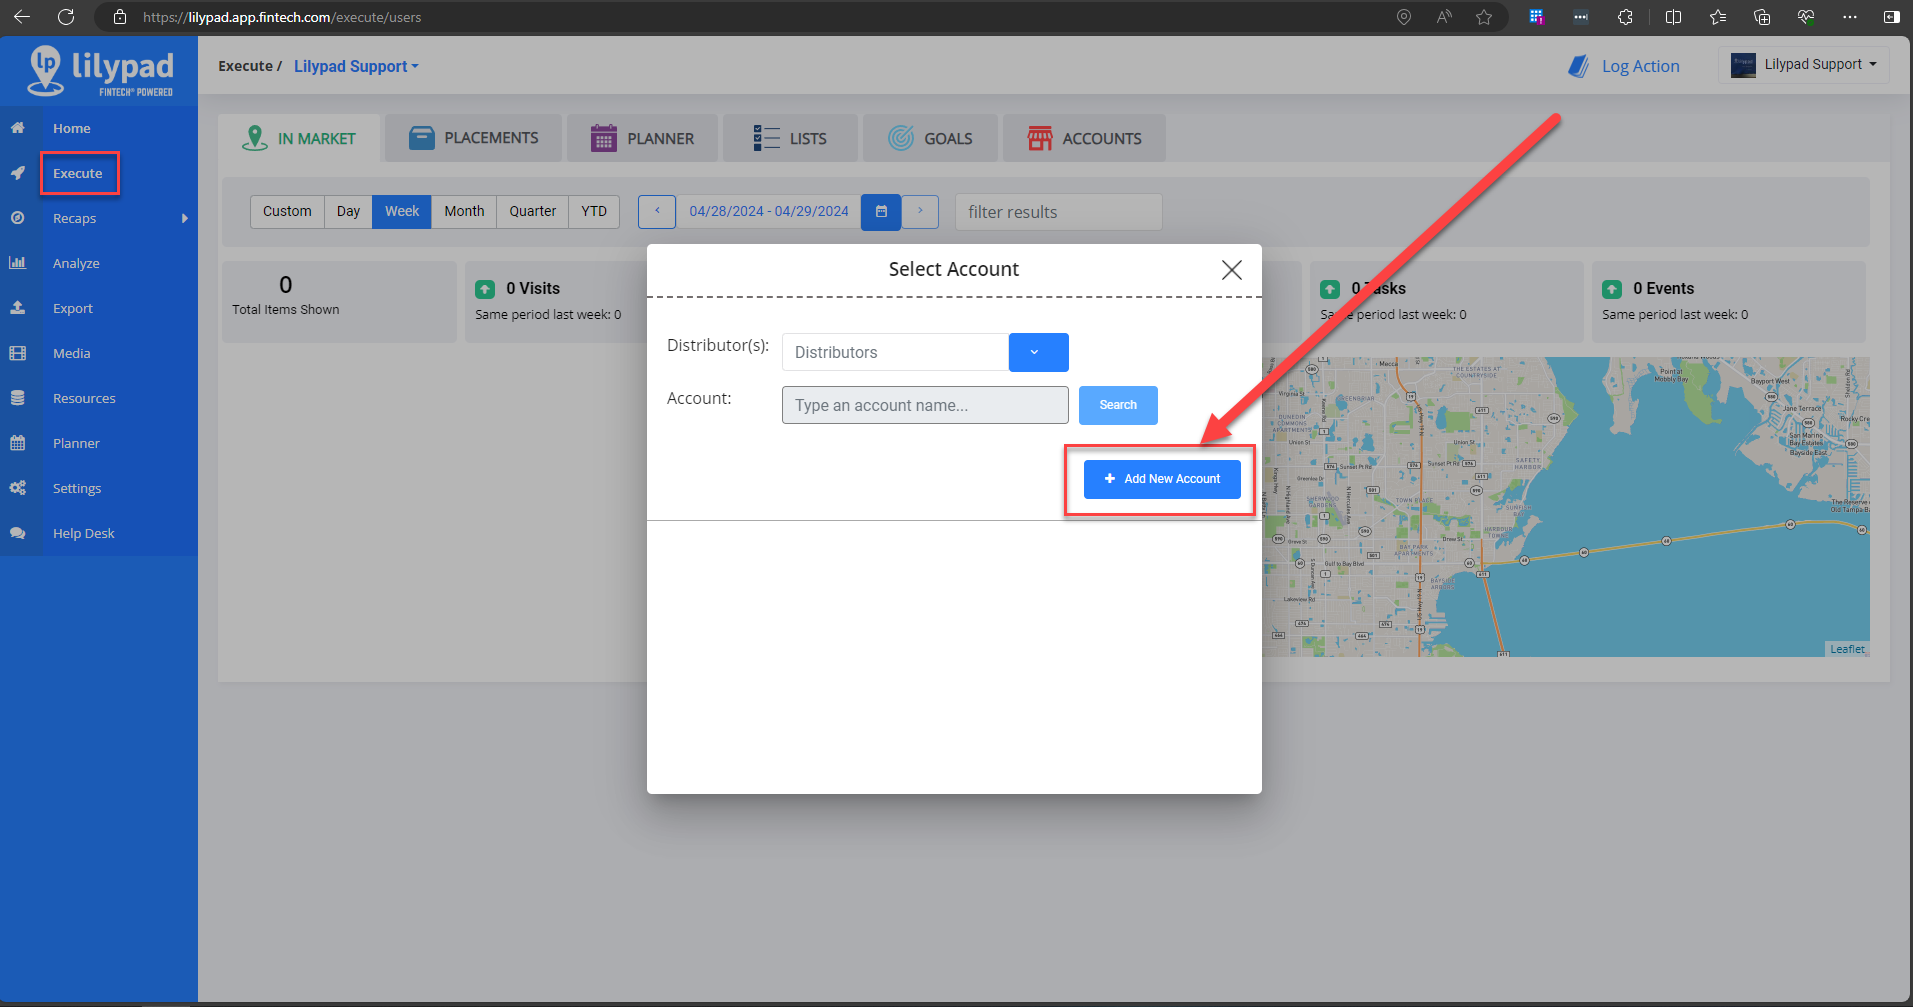
The first place where you can find the Add New Account button in the web app is under the Side Menu > Execute tab. From there, click the “Log Action” button in the upper right corner to start a new Placement or select an Activity or Task that requires an account to be selected. On the “Select Account” screen, you'll see the “Add New Account” button.
**NOTE: If you do not see the “Log Action” button, this feature might not be enabled by your organization. Contact your organization's Lilypad Admin or email Lilypad support at lpsupport@fintech.com for confirmation.
Just like in the mobile app, start by searching for an account name and/or address in the Search field above the map, select an account, and then fill in all required fields in order to enable the “Save New Account” button in the lower right corner. Click this button to save your new account.
The following fields will pull from Google, auto-populate once you select an account, and they cannot be edited:
- Account Name - If an account is found by Google, it is not recommended to change the account name since this could pollute future account data. If you searched by account name at the top of the screen, then that account name will populate here. If you searched by street address and Google is unable to find the account, then the street address may appear in this field. Be sure to edit this to the proper account name before saving so that you can search by account name, not just by address, in Lilypad in the future.
- Street Address
- City
- State
- Postal Code

The second place where you can find the Add New Account button is under Side Menu > Settings > Account Actions. You must be setup as an Admin on your LP User profile page to be able to access the “Organization” section of the settings that contain the “Account Actions.” From there, click the “Add New Account” tab to begin manually creating a new account.
