

The Planner tab in the Execute - Sidebar allows a user to view and manage all upcoming items on their Lilypad calendar (web equivalent of Blue Pushpin > Plan tab > Calendar in mobile).
This tab consists of two types of views users can toggle between: Calendar and Plan vs. Actual
Calendar View
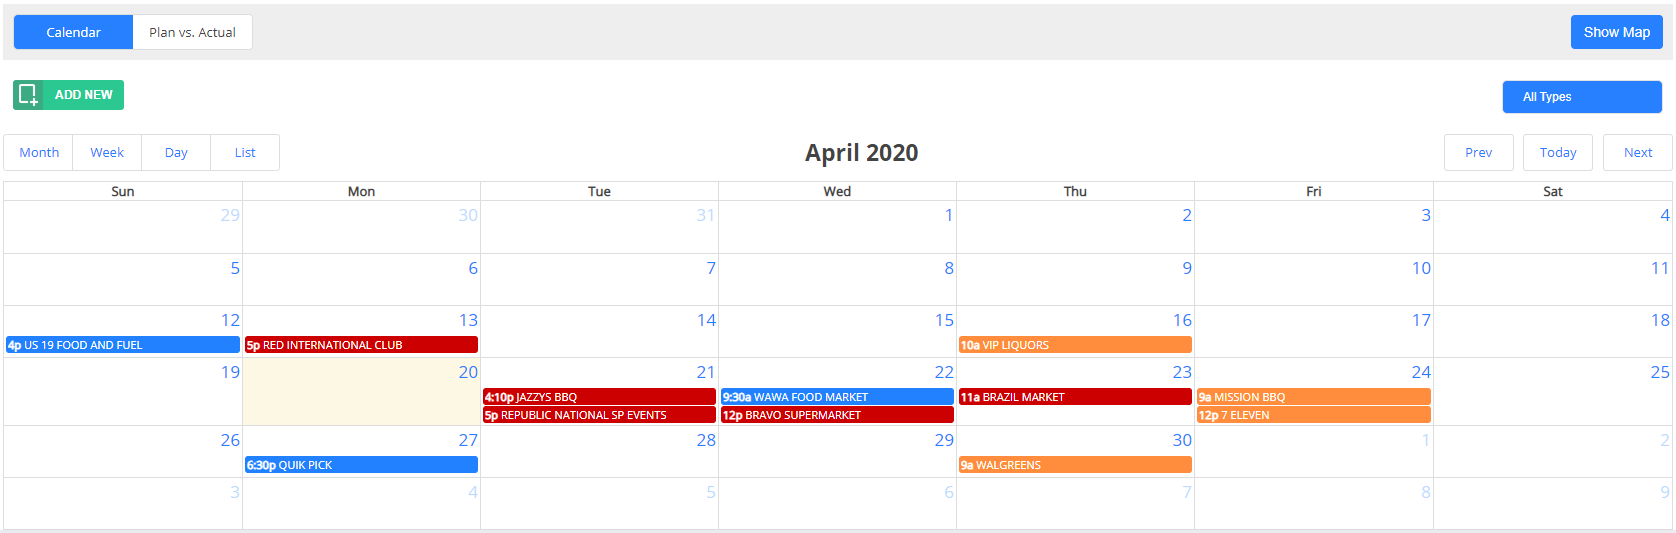
Users can choose between monthly, weekly, daily, or a list view of their upcoming planner items by selecting one of the options found below the green Add New button.
At the top right of the calendar, users have additional toggles to see previous and future periods, or go directly to the current day.
The blue All Types button allows a user to filter the calendar by the type of planner item (Visit, Follow Up, Event, etc.)
The Show Map or Hide Map button in the top right allows the user to show a map view that chronologically depicts the location of each planner item for the selected time frame.
- Users can click one of the account pushpins from the map to see additional account information populate below the map screen.
Plan vs. Actual View
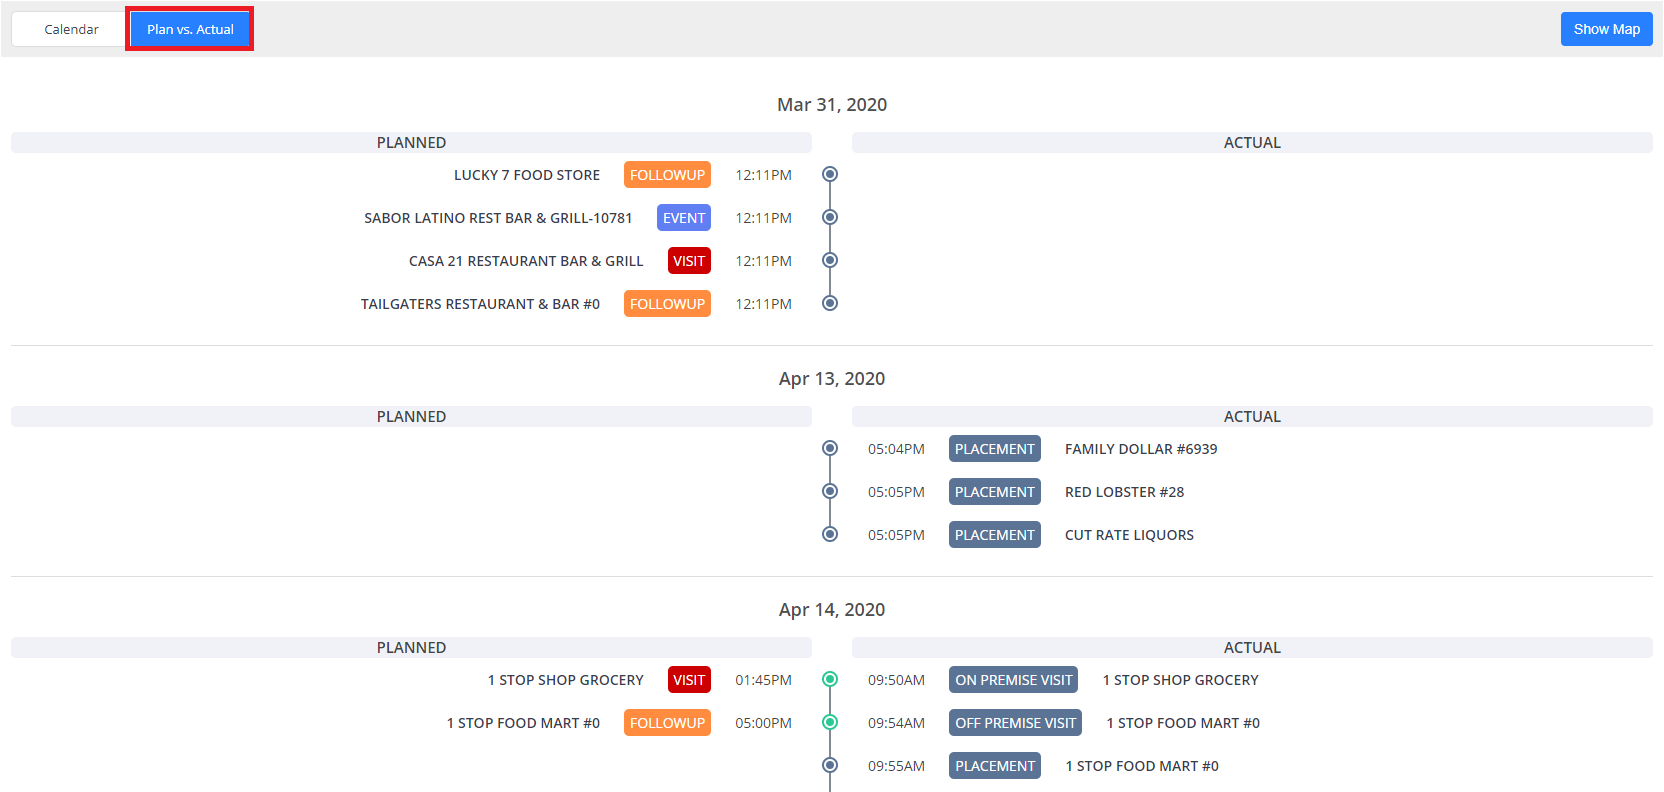
This view visibly shows users a comparison chart between scheduled planner items (Planned column) and completed market actions they logged in Lilypad (Actual column)
The circles in the middle will turn green when you execute a market action that was also a scheduled planner item.
The Show Map or Hide Map button at the top right of the screen allows the user to show a map view of where each Planned vs. Actual account is located.
- Users can click one of the account pushpins from the map to see additional account information populate below the map screen.
Adding New Planner Items
- Click green Add New button (located below the "calendar" view toggle).
- Choose the Planner Item you’d like to add to your calendar.
- Users have 8 options to choose from: Visit, Follow Up, Event, Meeting, Work With, Warehouse Visit, Admin Time, and Out of Office
- If choosing an account specific planner item (i.e. Visit, Follow Up, or Event), search and select the Distributor and the Account.
- Enter a Date and Time.
- Choose a duration length.
- Choose whether to make the planner item recurring.
- Choose whether to have a remindersent for the upcoming item.
- **NOTE: Check the Send calendar invite box to send a calendar invitation to the email associated with your Lilypad profile, then go to your email inbox (from the desired sync device) and accept the calendar invite to add the planner item to that default device calendar.
- Enter notes about your planner item.
- Click green Create button.
- The planner item will be available on both the Lilypad web and mobile app