
General Goals in Lilypad are basically Key Performance Indicators (KPI's) and are how Admins/Managers can both track and incentivize rep activity out in the market. Sales Based - General Goals allow for that tracking to be purely around product driven metrics and invoices indicating confirmation of those sales or product landing into accounts.
**NOTE: Sales-based goals can only be tracked if you subscribe to LDS Data or VIP, as we need to be receiving Depletion/Sales data from each relevant Distributor that you work with.
Getting to General Goal Setup Page
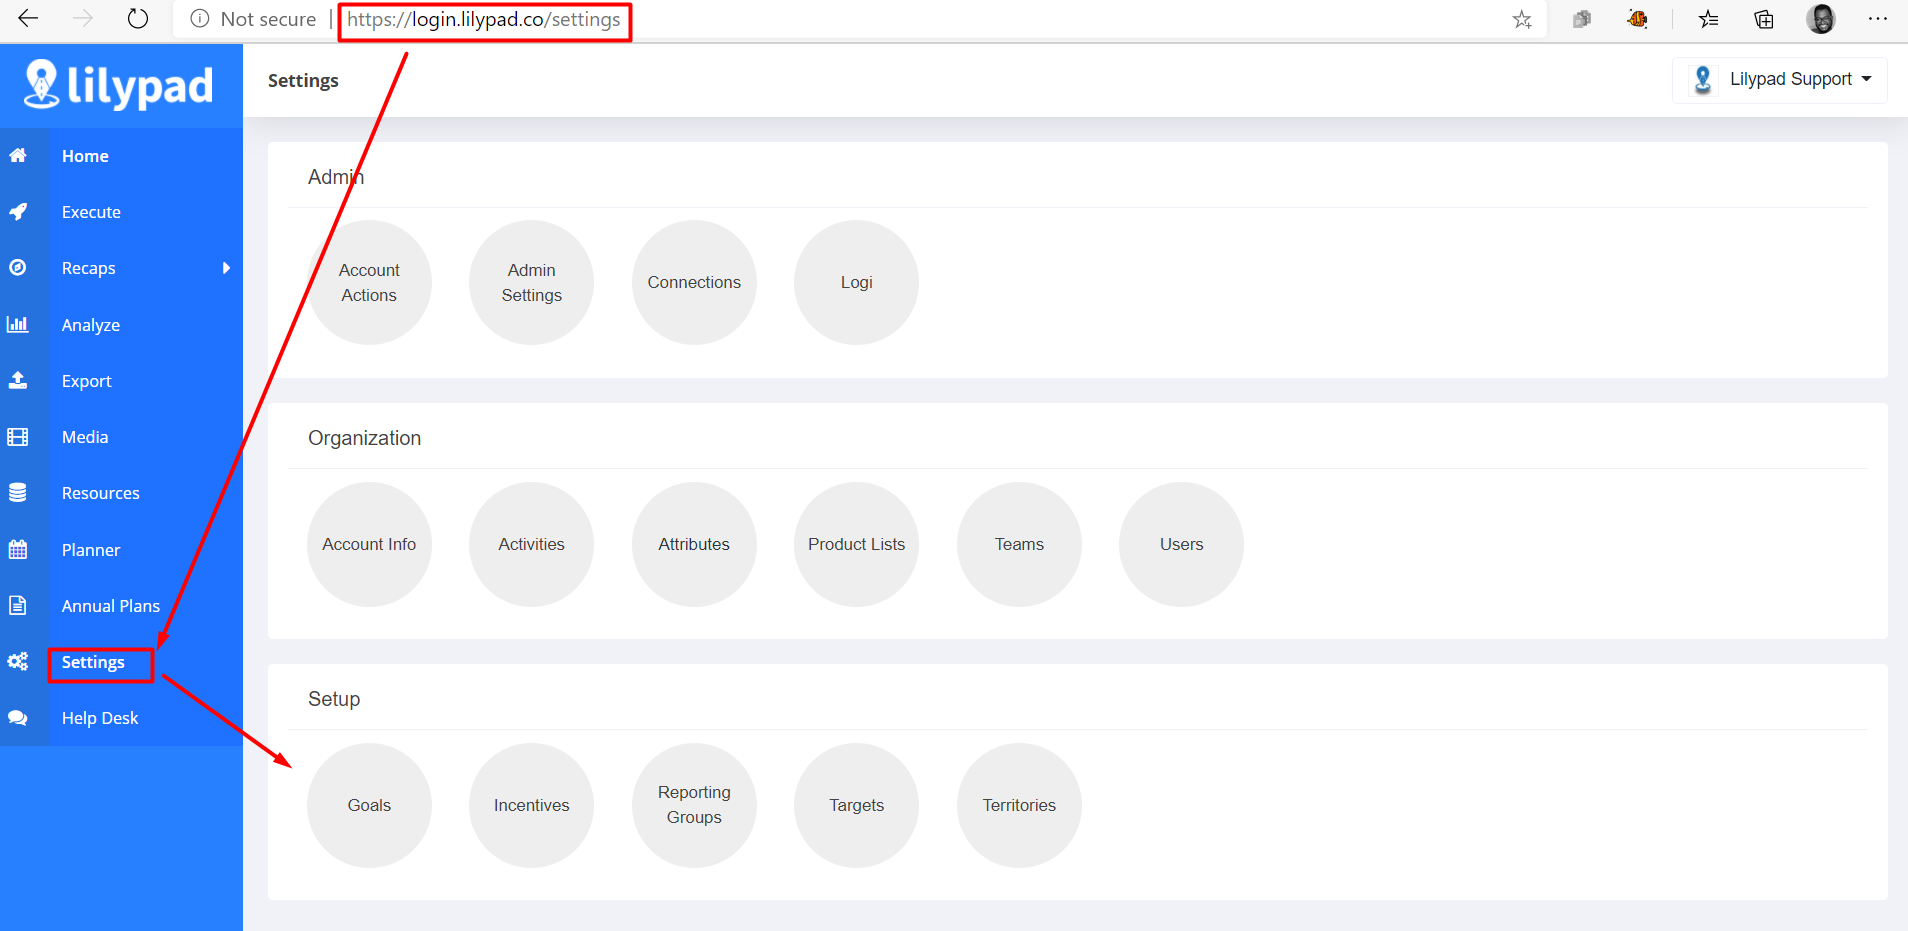
1 Log into the Lilypad Web App (lilypad.app.fintech.com).
2 From the side bar on the left, click on Settings.
3 Under the Setup section, click into the Goals bubble.
Creating New Goal - Sales Based
1Once on the Goals setup page, using the drop down menu towards the top left side of the screen, you can narrow down the list of users by selecting a specific Team. Then, simply select the User to create the goal for.
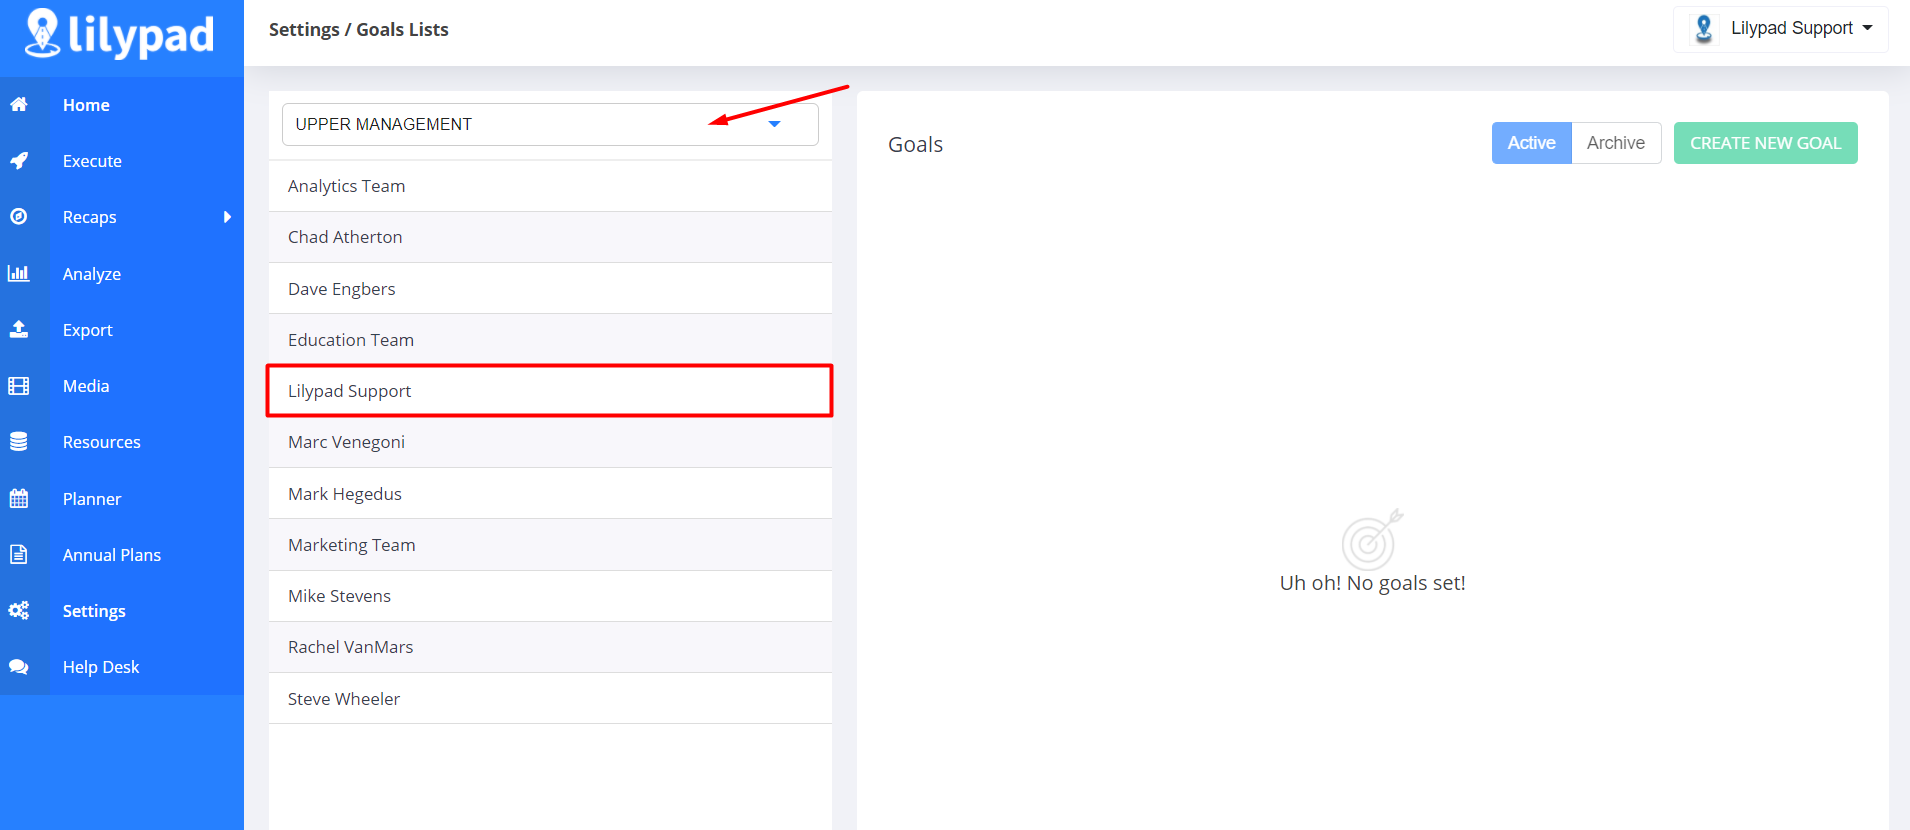
2 Click the green Create New Goal button to the upper right side of the screen. The Create New Goal window will pop open.
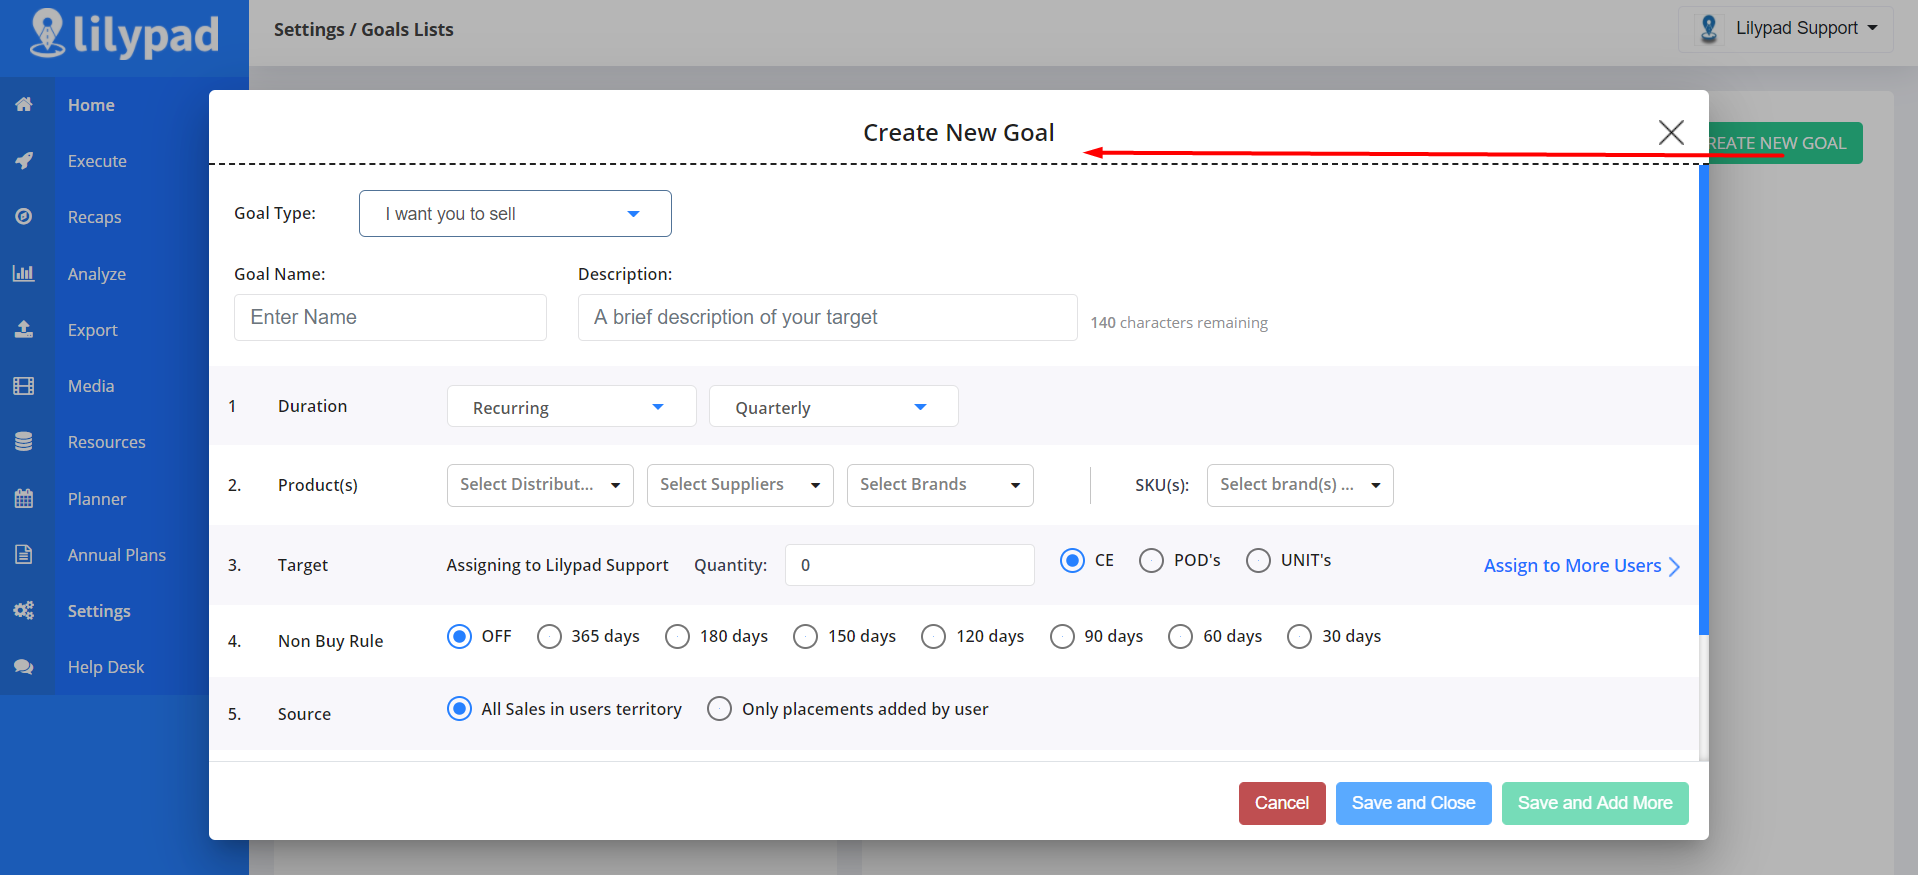
3 Next you'll need to choose the Type, Name, Description for the Goal:
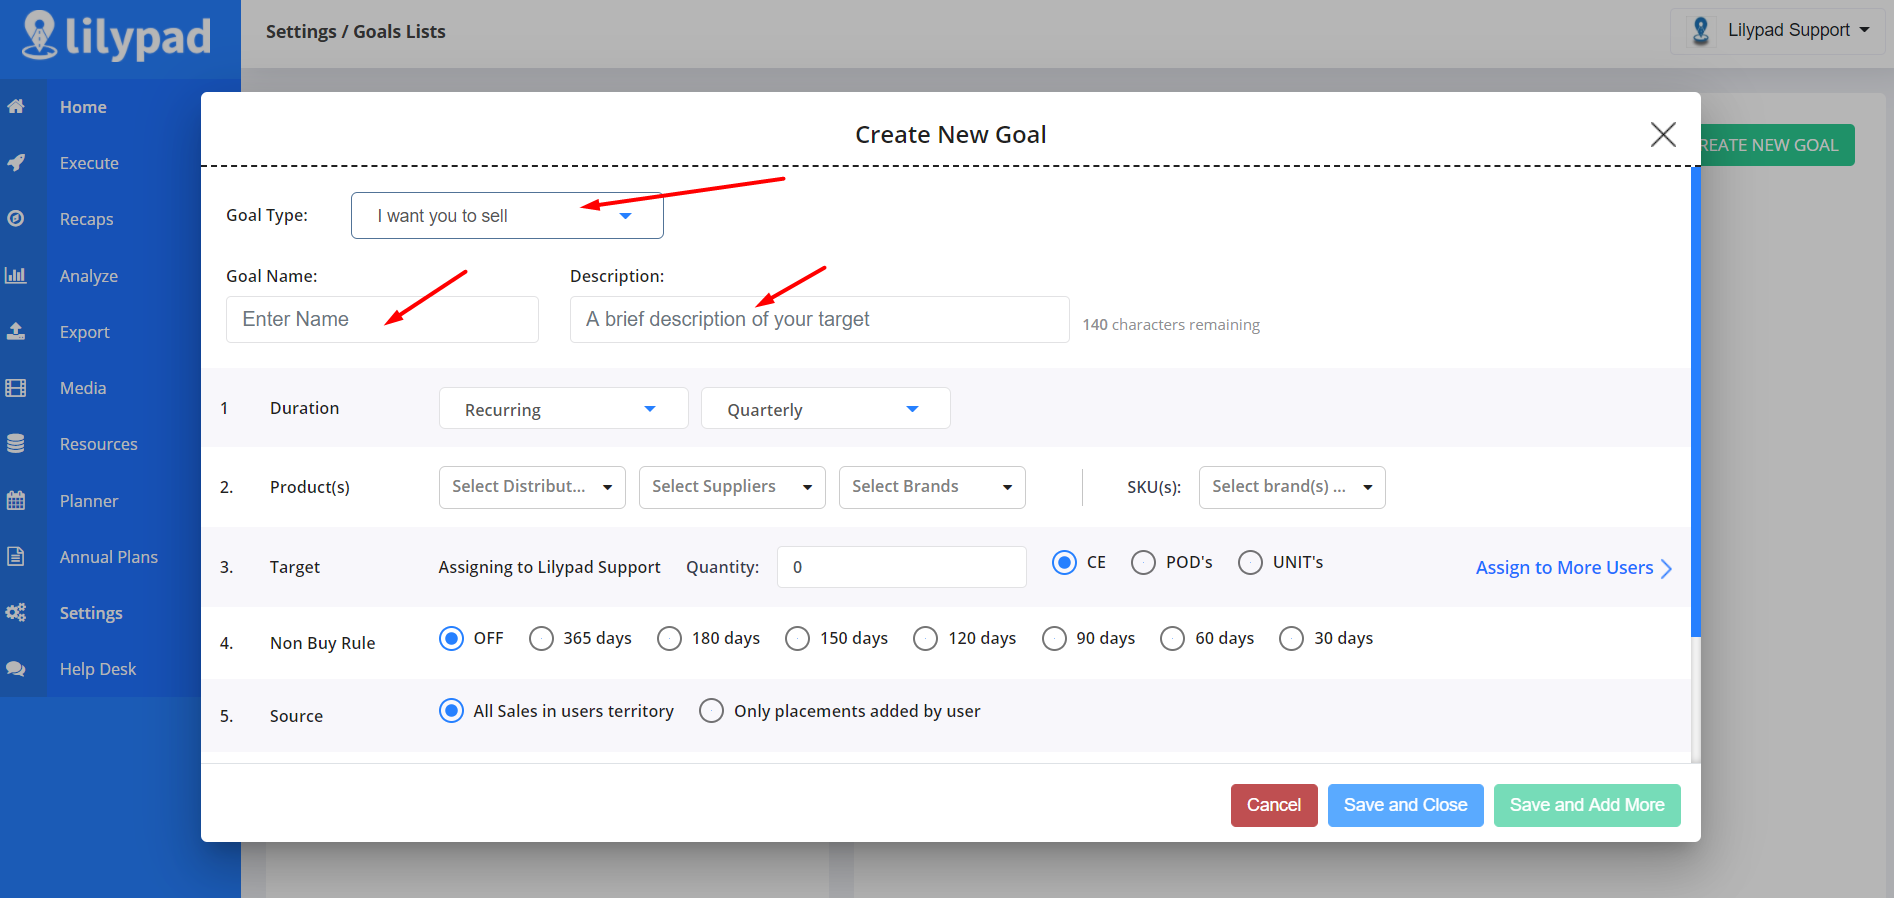
Goal Type (Accomplish vs. Sell)
This drop down automatically defaults to the I want you to sell option or Sales Based goal type so you can leave that as is. You can also set goals to the I want you to accomplish option or Activity Based goal type. **NOTE: Please see our How To - Create A Goal - Activity Based for more details on that goal creation process.
Goal Name
In the text box, just type a Name for the goal that clearly indicates to the users/reps what is being tracked (i.e. Seasonal Draft SKUs, 4/6/12 Packages Sales, etc.)
Description
In this text box, add a Description of what the requirements are to complete the goal and what the overall target value is. This is optional.
4 Next, you'll need to select a Duration for the goal. Using the dropdown, select from one of the following options: Recurring or Specific Date Range
Recurring
This option allows you to create an automatically Recurring goal on a weekly, monthly, or quarterly basis, which indicated in the second dropdown of this Duration field.
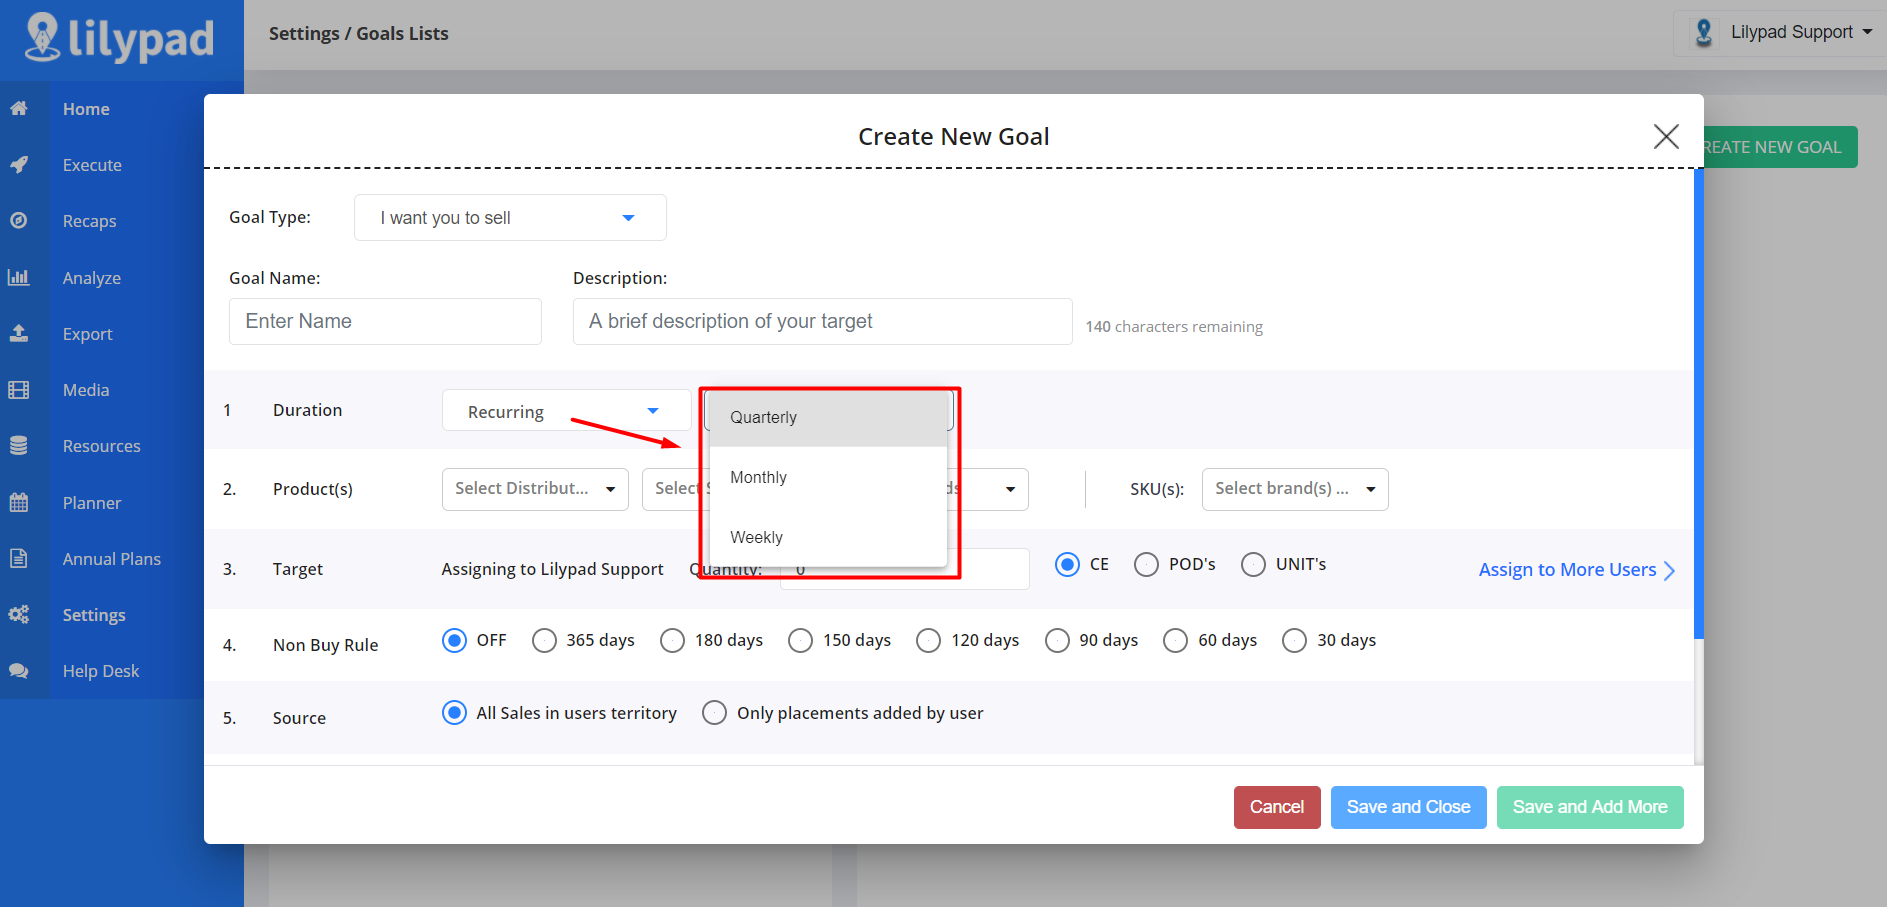
Specific Date Range
This option allow you to create a Specific Date Range goal that will track only during the specific time frame selected in the second dropdown of this Duration field.
Clicking in the second drop down, opens a calendar view which can than be used to indicate your desired time frames.
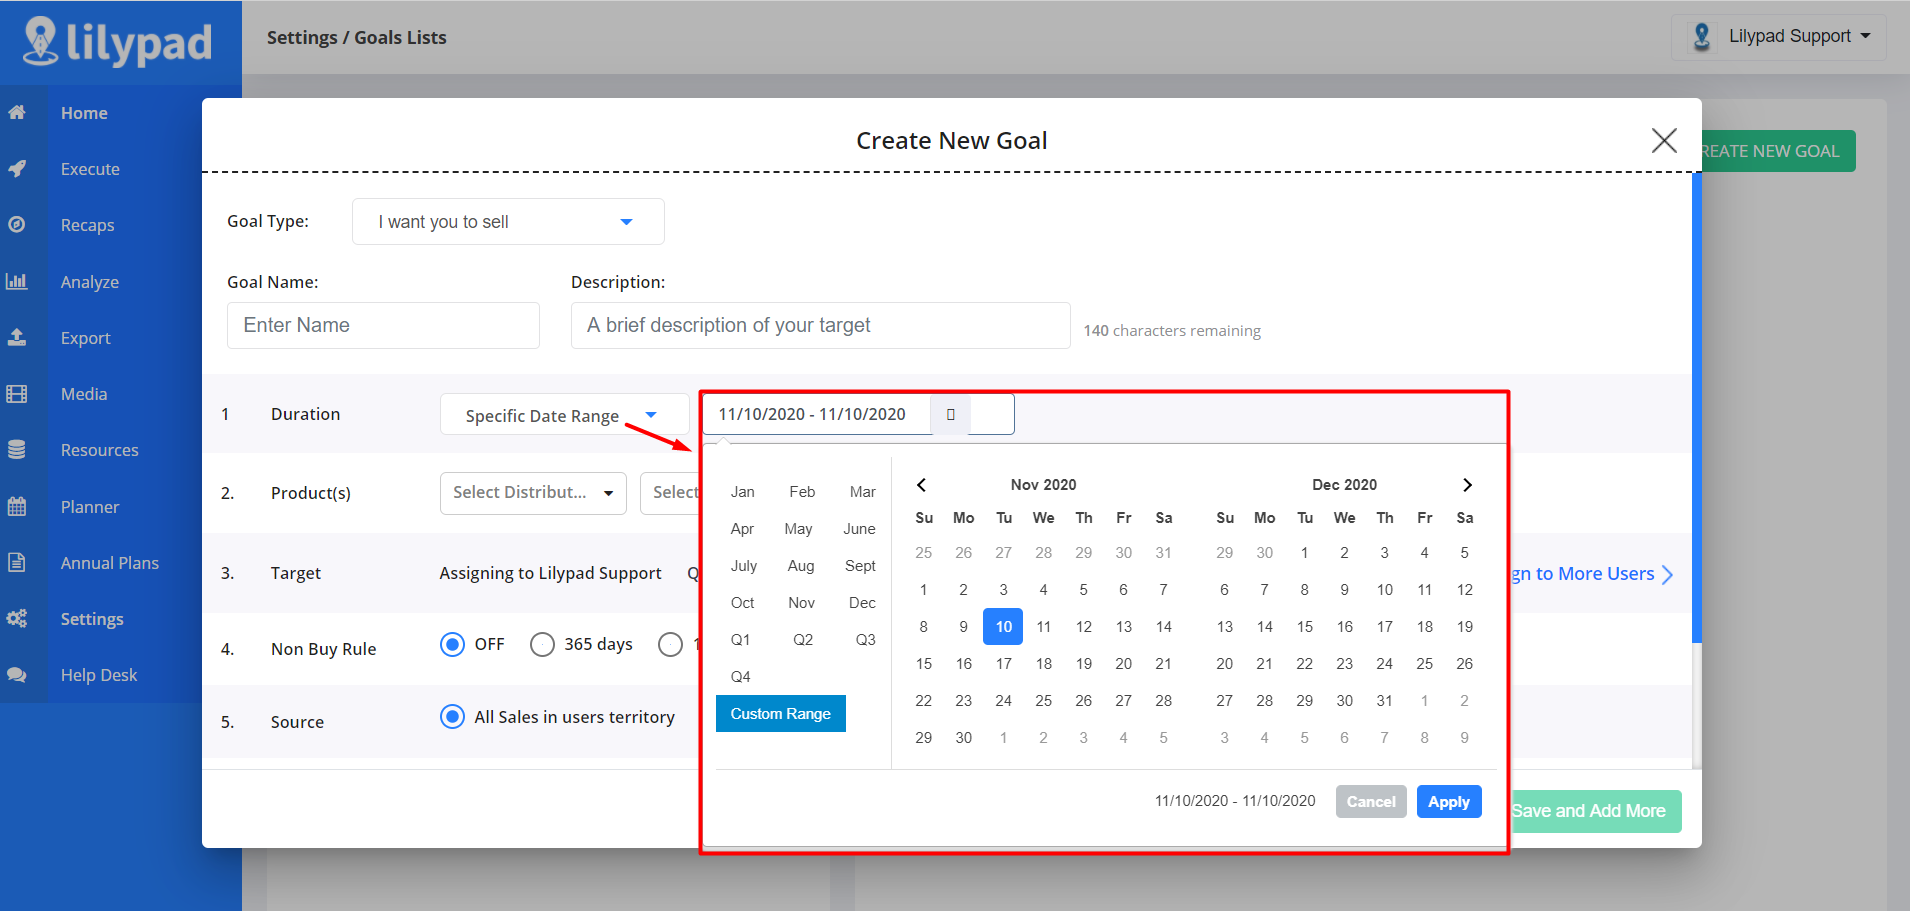
To set a range other than the default options of a specific month or quarter, just click the blue Custom Range button, then on the calendar click on the start date followed by the end date. Lilypad will automatically highlight all the days within the start and end dates you selected to create your custom time frame.
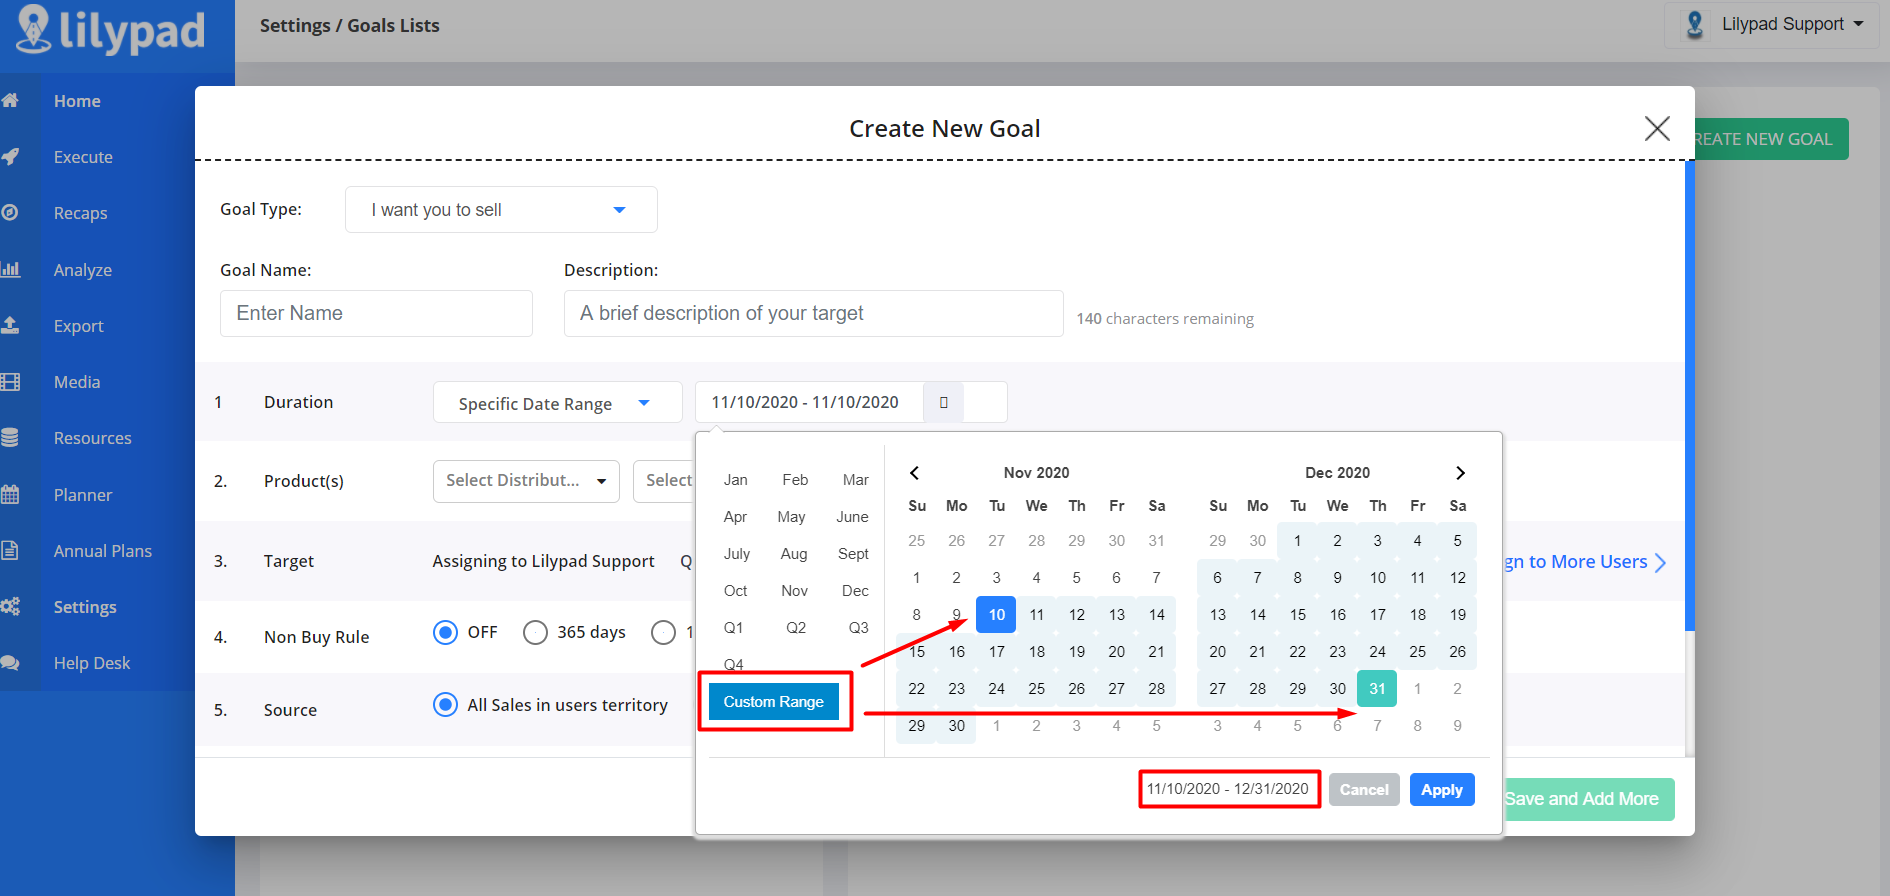
Click the blue Apply button once you've completed setting your desired time frame.
5 The Product(s) field dropdowns allow you to select which Distributor(s) sales to count towards this goal, the specific Brand(s) to track this goal against, and the specific SKU(s) to track.
6 Next, you'll use the Target field to set the Quantity or target value you want the user/rep to hit. This target value can be tracked via 3 different metrics: CEs, PODs, or Units
CEs
This allows you to track total case equivalents sold in your previously selected desired time frame.
PODs
This allows you to track total points of distribution at either the Account or SKU level.
PODs by Account
PODs by Account means that, if a sale is reported within a specific account for any of the products this goal is set to track against, then the rep will not receive credit for the sale against this goal, even if it is for a new product that the Account has not purchased before.
PODs by SKU
PODs by SKU means that, if a sale is reported within a specific account for a brand new SKU that the account has not purchased before, then the rep will receive credit for the sale against this goal.
Units
This allow you to track total number of units sold within your desired time frame. This option also evens out the playing field, so that no matter what is sold in (keg vs. package), everything is worth one unit.
7 The Non-Buy Rule field is where you can determine if this goal either permits or disallows a previously Buying Account to count towards the goal.
If left Off both non-buying and buying accounts are counted.
If one of the other selections are chosen (30 days, 60 days, 90 days, etc.), then a buying account will not tally into the goal based on the time frame that was chosen. (EX; Non Buy 60 days was chosen, any account that has purchased within the last 60 days will not count towards this goal).
8 The Source field lets you determine which ways that sales/placements can be entered or received in Lilypad will actually count towards this goal. This field has two selection options to choose from: Only placements added by user or All Sales in user's territory
Only placements added by user
The Source field defaults to this option. This option ensures that only placements made by the rep will count towards this goal.
All Sales in users territory
This option will only be available, if Territories have been created for the particular user/rep for which you're creating this goal. **NOTE: You can see our How To - Create A Territory article for more info on that process.
Select this option choice if you're alright with all of the following counting towards this goal: any placement made by any rep in that territory, any placement dropped into the account by a distributor in that territory, or any other sales activity into an account in that territory.
9 Next, is the Chain/Independent field (if applicable). This field choice only populates when a Territory is set up for the user/rep. If so, it allows you to filter the goal based on an Account being either Chain or Independent.
10 The Premise field, allows you to filter the goal based on sales within either on or off premise accounts specifically.
11 Lastly, once all applicable fields are completed, click the blue Save and Close button at the bottom of the window. If you have more goals to create for this particular user, you can click the green Save and Add More button to open another Create New Goal window then complete steps 3-11.