Overview
The Import Account Contacts feature allows you to upload a large list of account contacts (for several accounts) at one time instead of searching for each account and manually adding contacts to each one. This feature is especially useful if your organization switched from a Customer Relationship Management (CRM) sales tool and recently started a new instance with Lilypad.
Important Notes
- In order to view the Account Actions bubble (which includes the “Import Account Contacts” feature) in the web settings, you must be setup as a Manager and an Admin on your user profile page in Lilypad. Navigate to Settings > Users > and select a user to make these changes.
- If your organization recently left another CRM sales tool, export a list of all Account Contacts from that sales tool so that you can use it for the upload into Lilypad.
- This feature is for importing Account Contacts, not Distributor Contacts.
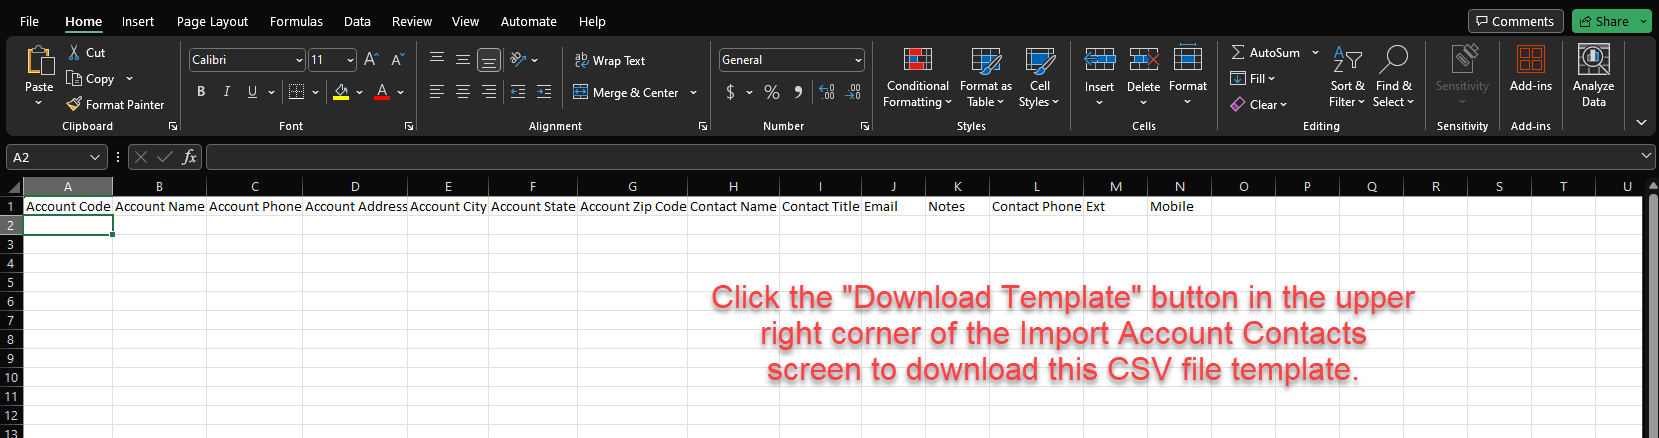
- You must use a CSV formatted file to complete this import in Lilypad. No other file type will work. When you land on the main “Import Account Contacts” screen in Lilypad, click the “Download Template" button in the upper right corner to download the CSV file template. This file has properly formatted column headers. Copy and paste - or type - data into this CSV file template under the appropriate columns.
- Do not change or delete the column headers (ex: Account Code, Account Name, Contact Name, etc.). This can disrupt the upload or prevent it from occurring altogether.
- In the CSV file template, Account Code and Contact Name are the only required fields. All other fields can remain blank, if you'd like.
- Account Code is the same as Account ID. In the CSV file template, it is referred to as the Account Code, and Account ID is the term used throughout the Lilypad app.
- For Contact Name, if the contact has a first and last name, you can put both in the same cell with a space between the first and last name. If you only put one name in a Contact Name cell, it will automatically show as the contact's first name in Lilypad after the upload is complete.
- You can upload one or several account contacts for each account in your CSV file template, if you'd like.
How to use the Import Account Contacts feature
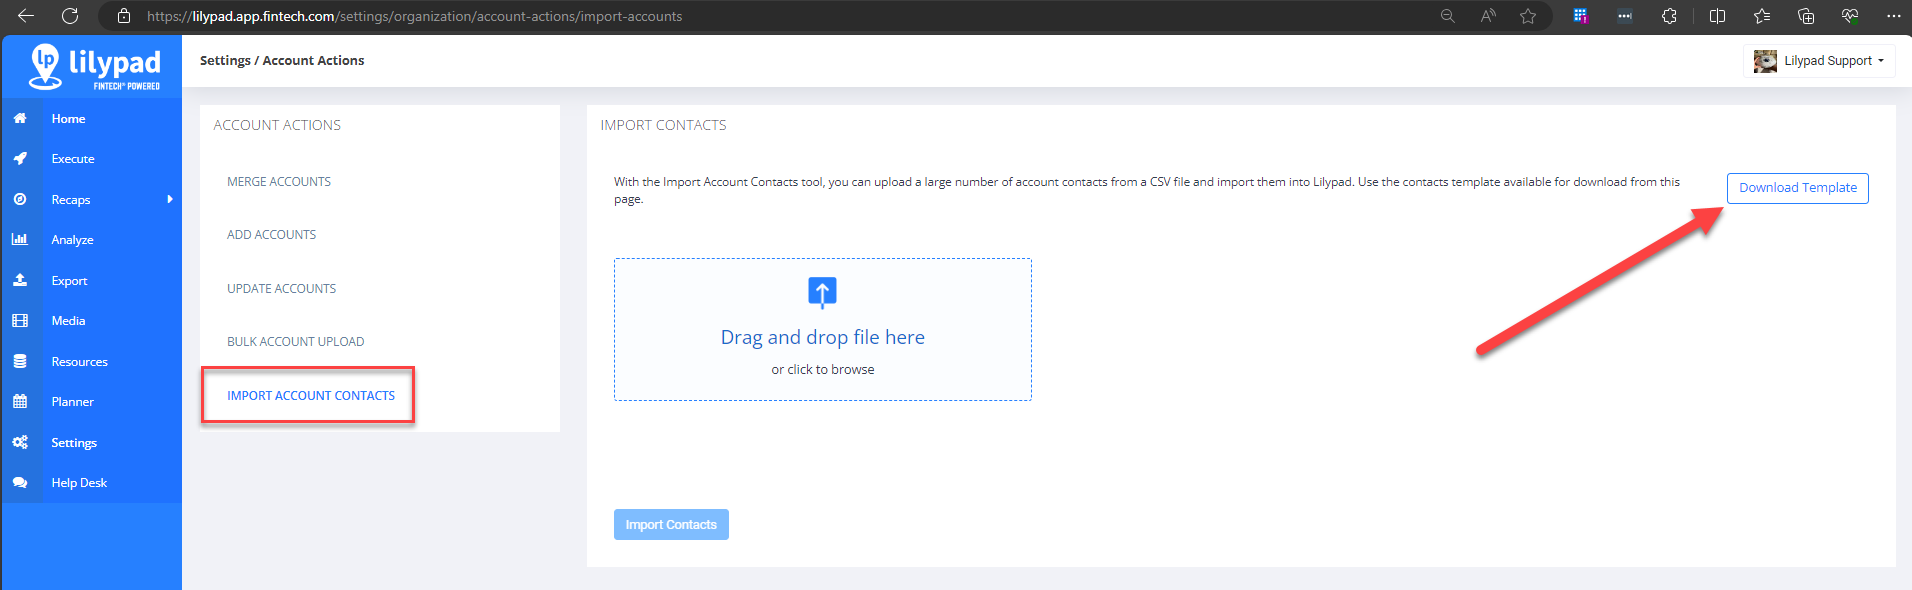
- In the web version of Lilypad, navigate to Settings > Organization row of bubbles > Account Actions > Import Account Contacts.
- Use the properly formatted CSV file by clicking the “Download Template” button in the upper right corner of the screen.
- Once your CSV file has been properly filled in, use the “Drag and drop file here" to add your file. You can also click the same box to browse your computer for your saved CSV file.
- After you add your CSV file, Lilypad will run a validation process to ensure these accounts exist within your organization's distributor account universe(s), and whether or not these contacts already exist for those accounts.
- **NOTE: During this validation, do not navigate to another screen within Lilypad or log out. This will disrupt the validation process, and you will have to upload your CSV file again.
- When the above validation process is complete, the “Import Contacts” button will now be enabled. Click the “Import Contacts” button to start the import.
- **NOTE: This is where the actual contact import takes place. This may take several minutes. During this import process, you can navigate to other screens within Lilypad without disrupting the import.

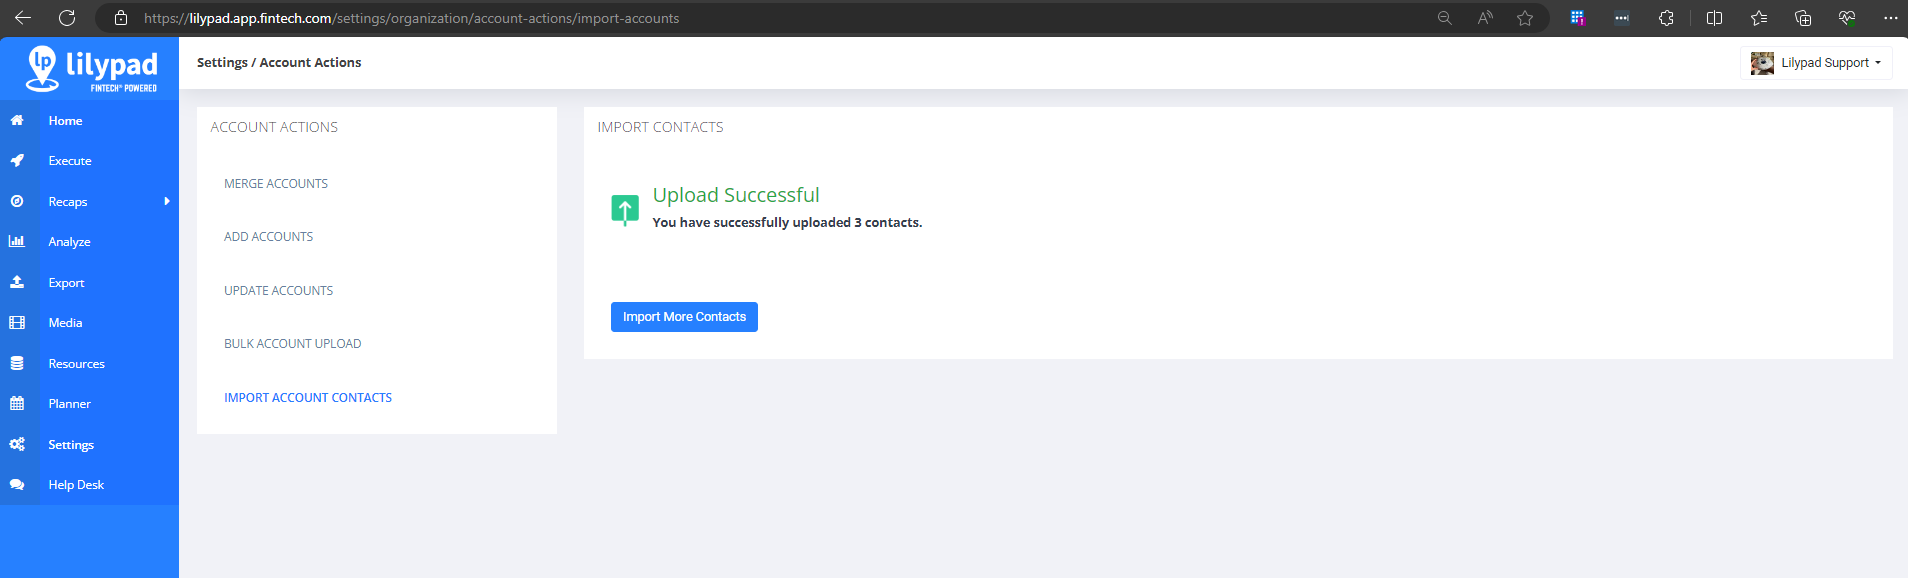
- If all account contacts were successfully imported without any errors, you will receive an “Upload Successful” message.
- If you'd like, you can tap the “Import More Contacts” button to go back to the main upload screen to upload another CSV file.
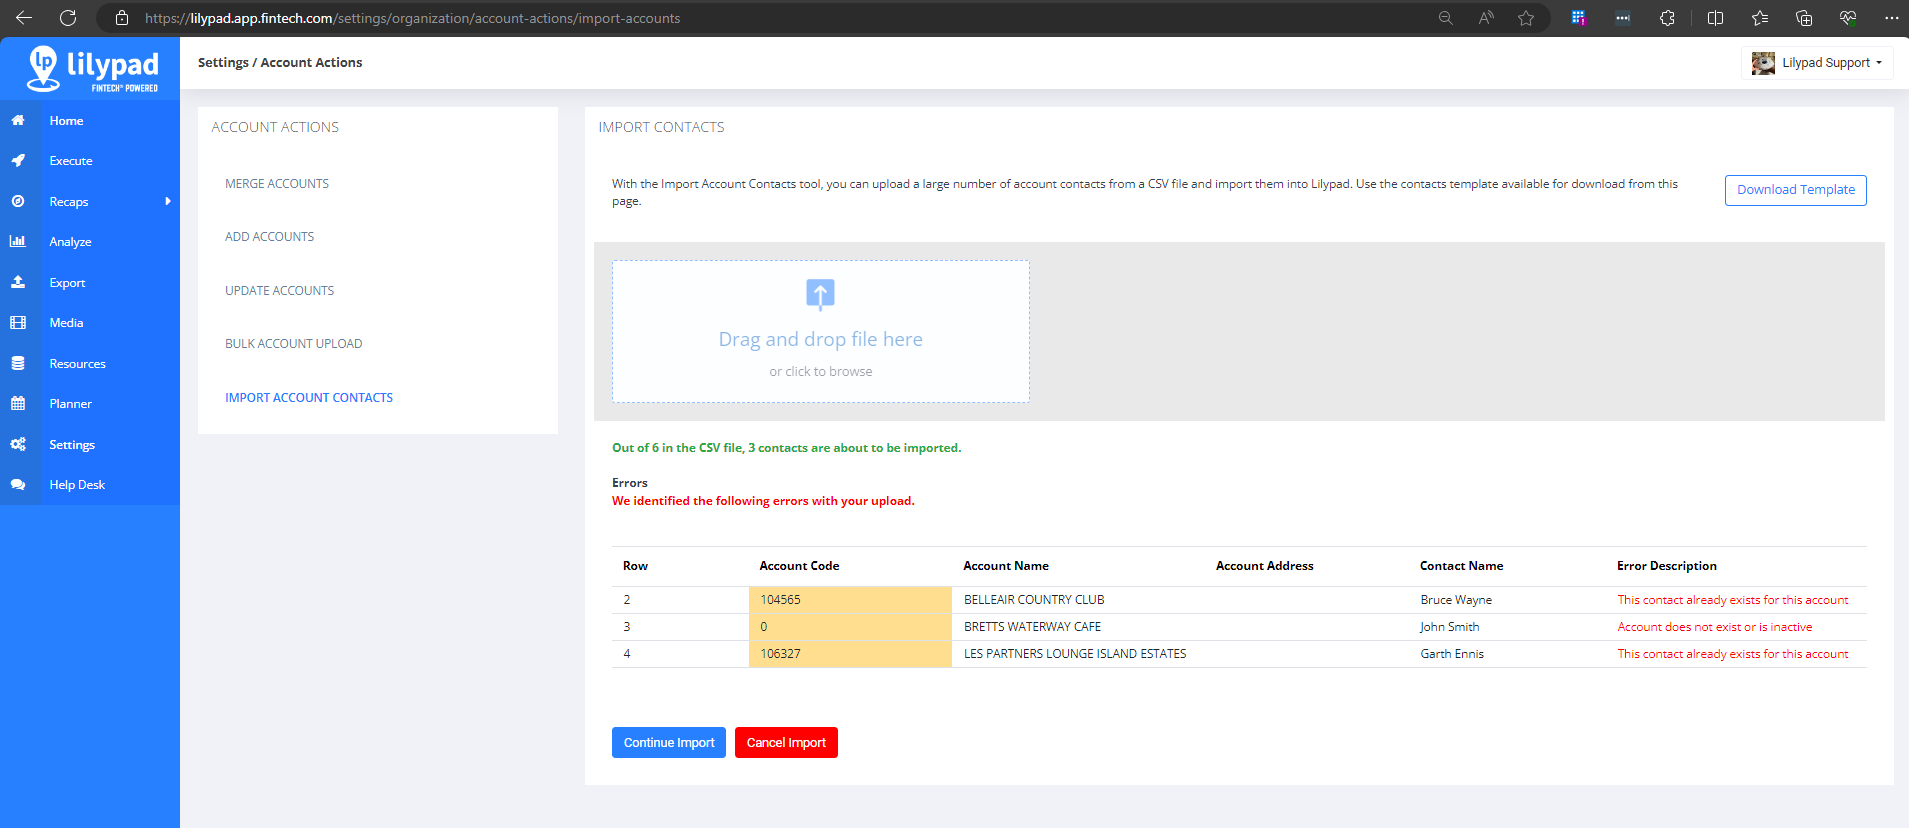
- If there were any errors during the upload, you will receive an “Errors” table with a “Row” column that shows which lines in your CSV file ran into errors during the import process.
- Examples of Error Messages:
- Account does not exist or is inactive.
- CSV file was not formatted properly.
- VIP Account Code is not part of any distributor account universe in Lilypad.
- If the “Contact Name” field is blank in the CSV file - “Contact Name field cannot be blank”
- If the “Account Code” field is blank in the CSV file - “Account Code field cannot be blank”
- This contact already exists for this account.
- If you receive error messages, you will see buttons to either continue or cancel the import.
- Continue Import - Click this button to only import contacts that did not receive error messages. None of the contacts with errors will be imported into Lilypad. Once complete, you will receive the “Upload Successful message.”
- Cancel Import - Click this button to cancel the entire import. None of the contacts will be imported, and you will be taken back to the main upload screen to add a new CSV file.