Overview
While creating a new or editing an existing survey (activity or task), you have the option for Checkbox and Radio button fields to spawn additional fields based on the selection made by your sales rep in the survey. These newly spawned fields are known as Conditional Fields.
**RELATED ARTICLE: How To - Create A New Activity or Task - Lilypad
How to Create a Conditional Field
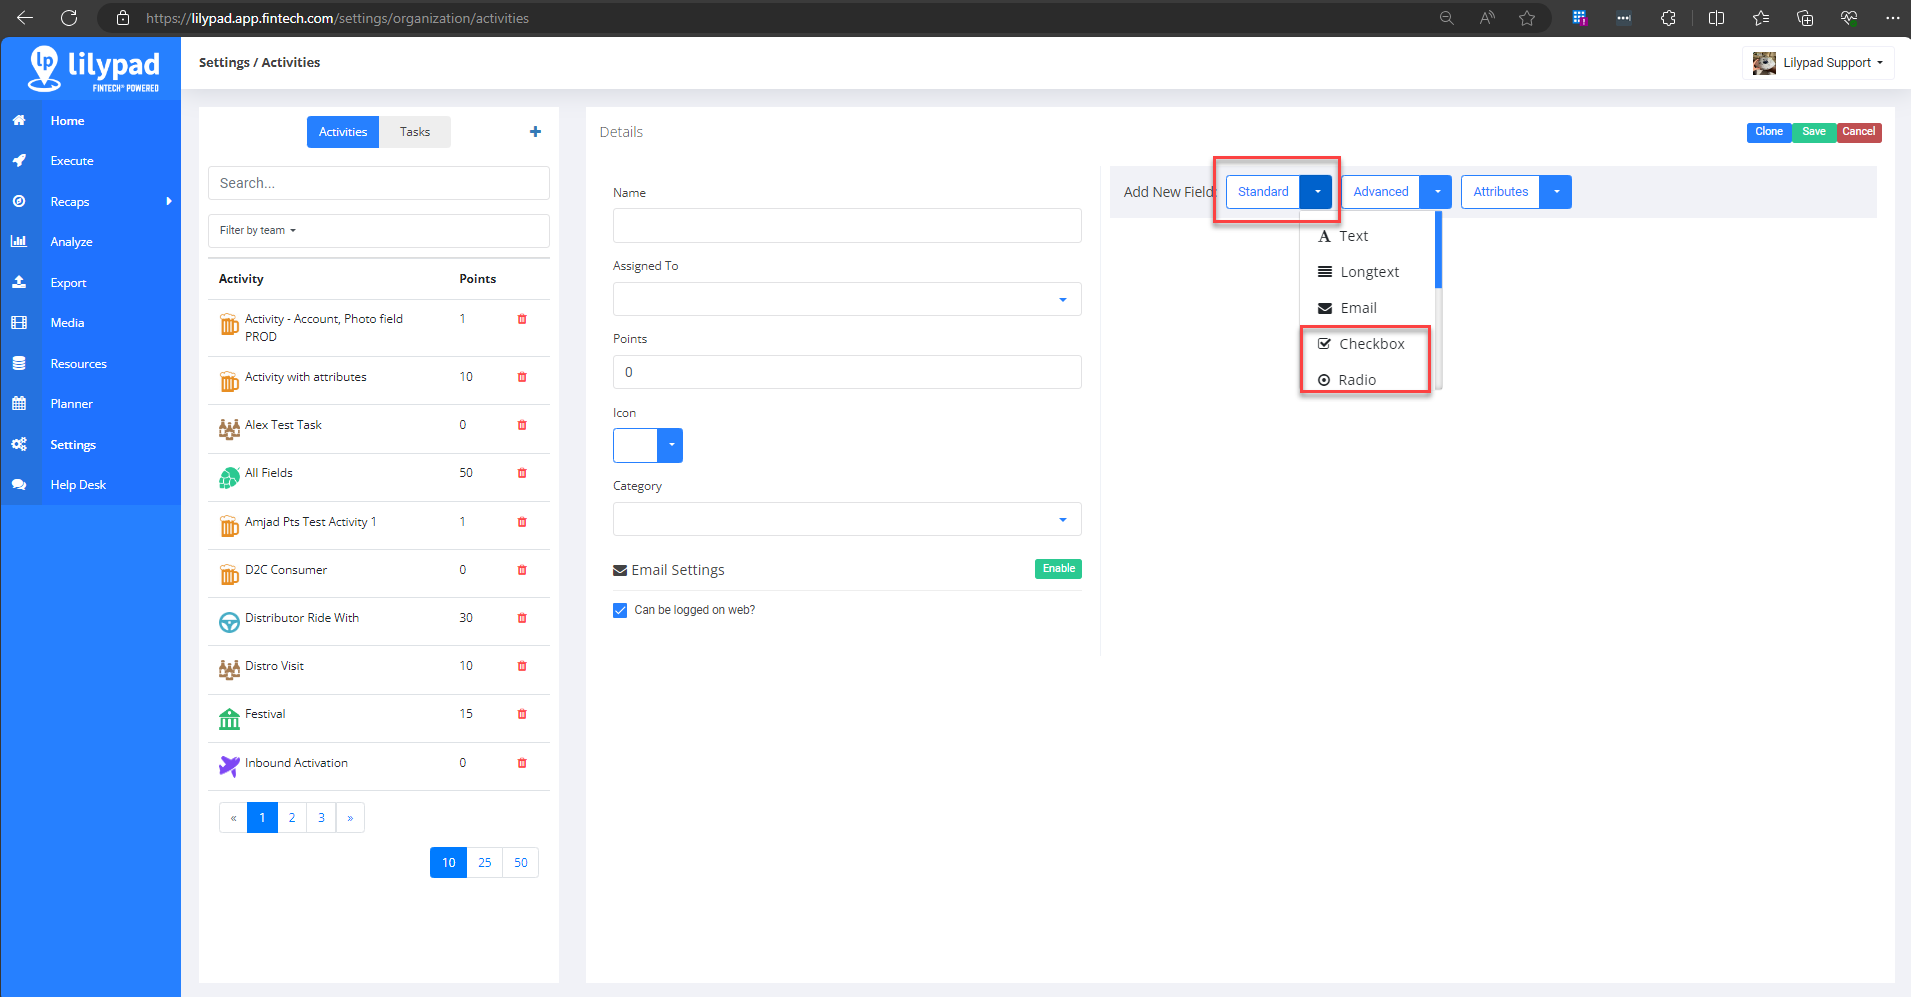
Conditional Fields can only be created from a Checkbox or Radio activity/task field. Within the Activity/Task settings screen, navigate to the Add New Field options, and tap the Standard dropdown to find the Checkbox or Radio options.
Checkbox ✅ and Radio  form fields allow you to have preset lists of options for your teams to select from. Checkbox fields allow the user to select multiple responses whereas Radio fields only allow a single response. However, both form field types can allow multiple options to select from in a list.
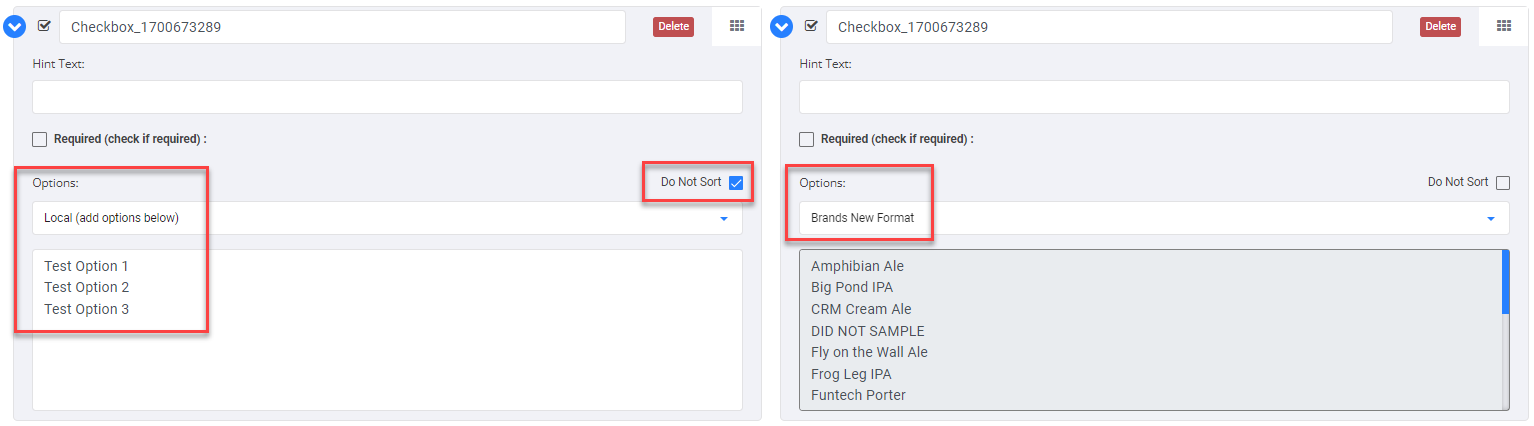
When creating Checkbox and Radio fields, the selectable responses will need to be entered into the Options section. The Options drop down menu allows for pre-existing lists from Settings > Product Lists to be utilized as the selectable responses, or the Local (add options below) option can be chosen to manually enter each of the selectable responses in the Options window.
- When using Local (add options below) each selectable option must be entered on a new line, so hit the Enter/Return key on your keyboard after you type each selectable response (except for the final one).
- Local (add options below) selectable responses will automatically display in alphabetical order in the Lilypad app. Use the Do Not Sort checkbox to keep the selectable responses in the order that they are listed rather than being alphabetized.
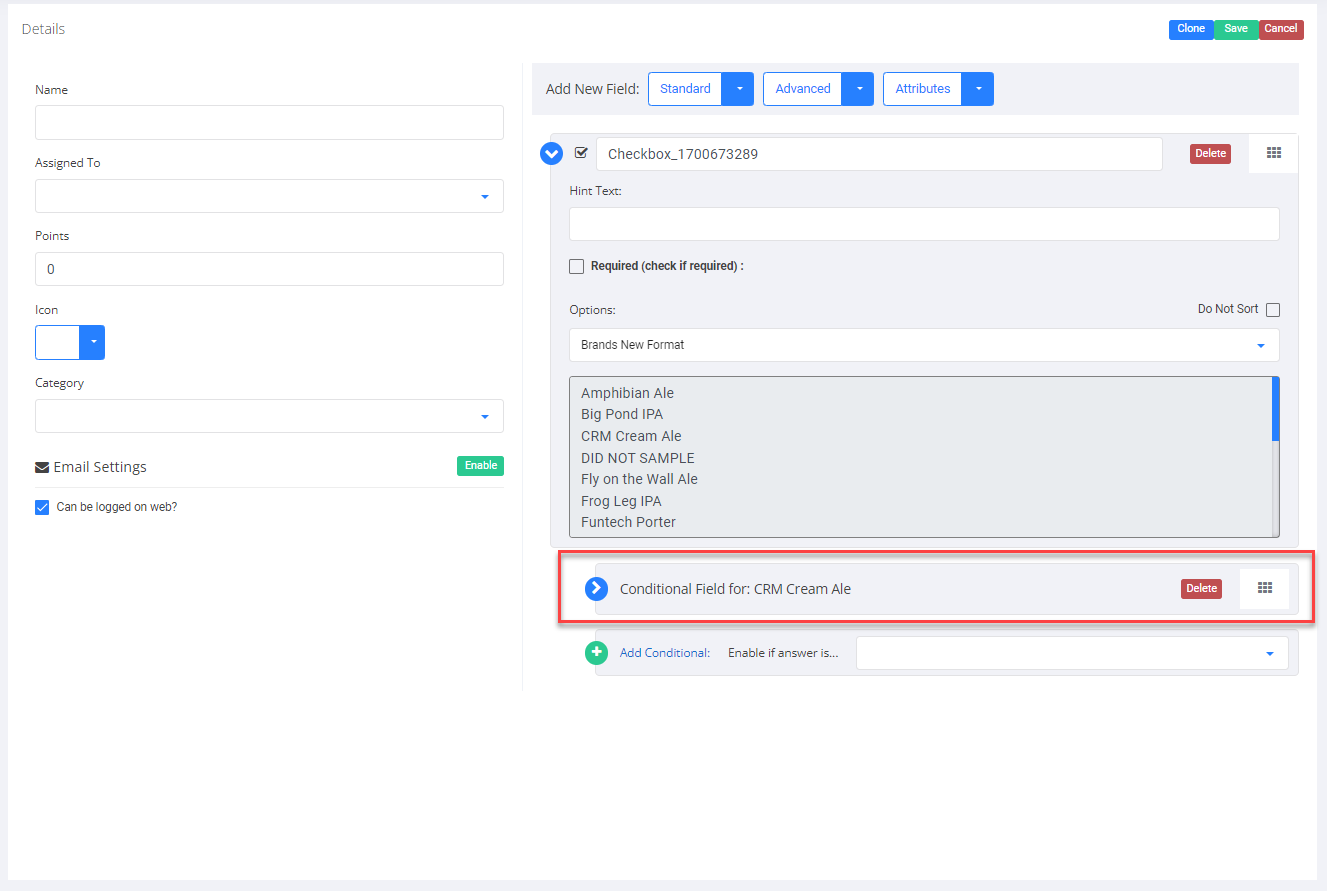
Conditional fields can be created based on available responses in Checkbox and Radio form fields. A conditional field is a form field that will only display if the associated response in the parent field is selected. The parent field is the Checkbox or Radio form field that the conditional field branches from. To create conditional fields:
- Expand the Checkbox or Radio field that will be used as the parent field by clicking the blue arrow to the left of the field label.
- Beneath the Options section select the drop down titled Enable if answer is… and select the response that the conditional field will be associated with.
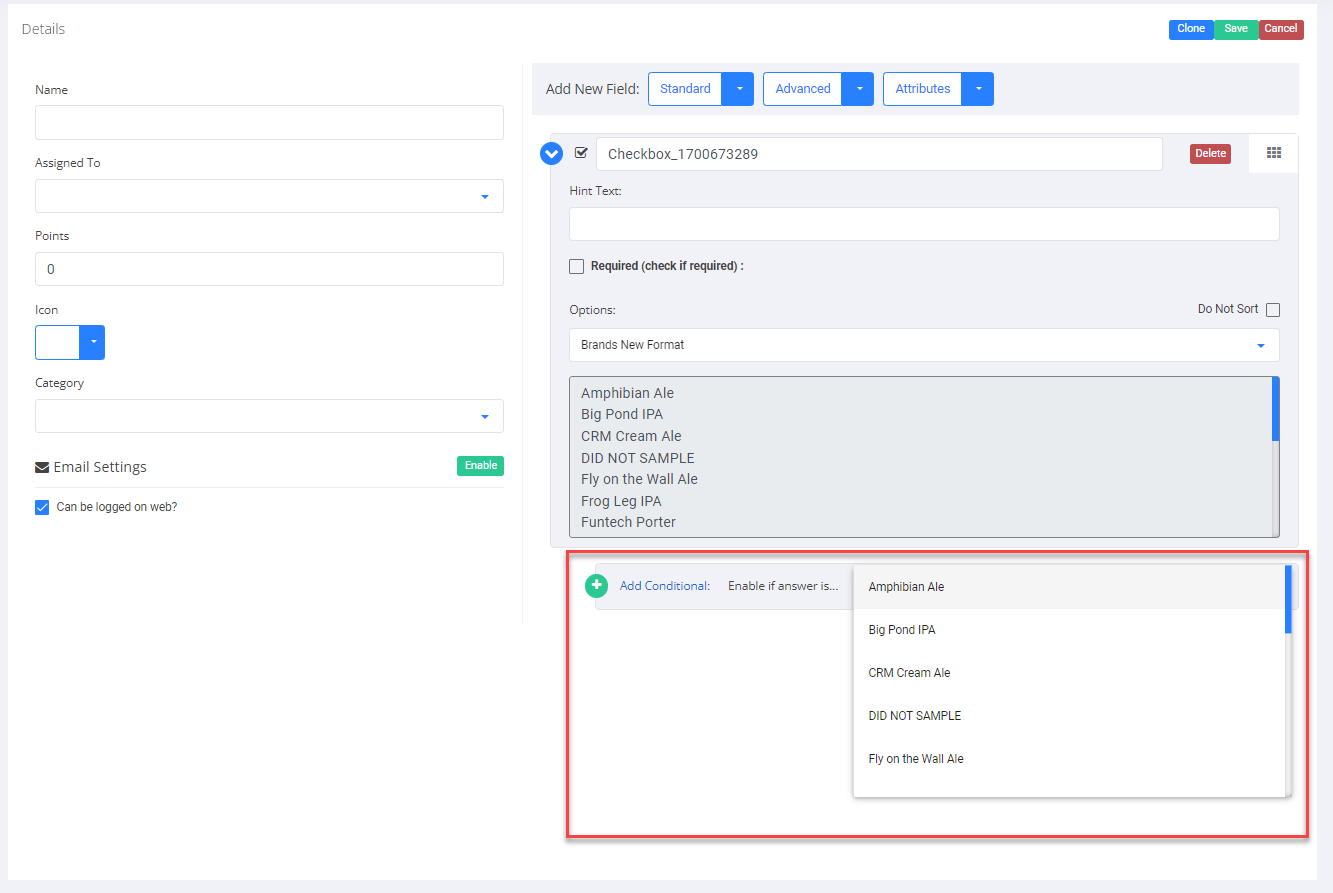
- Click the plus icon
 to add the conditional field (the plus icon will change to a blue arrow).
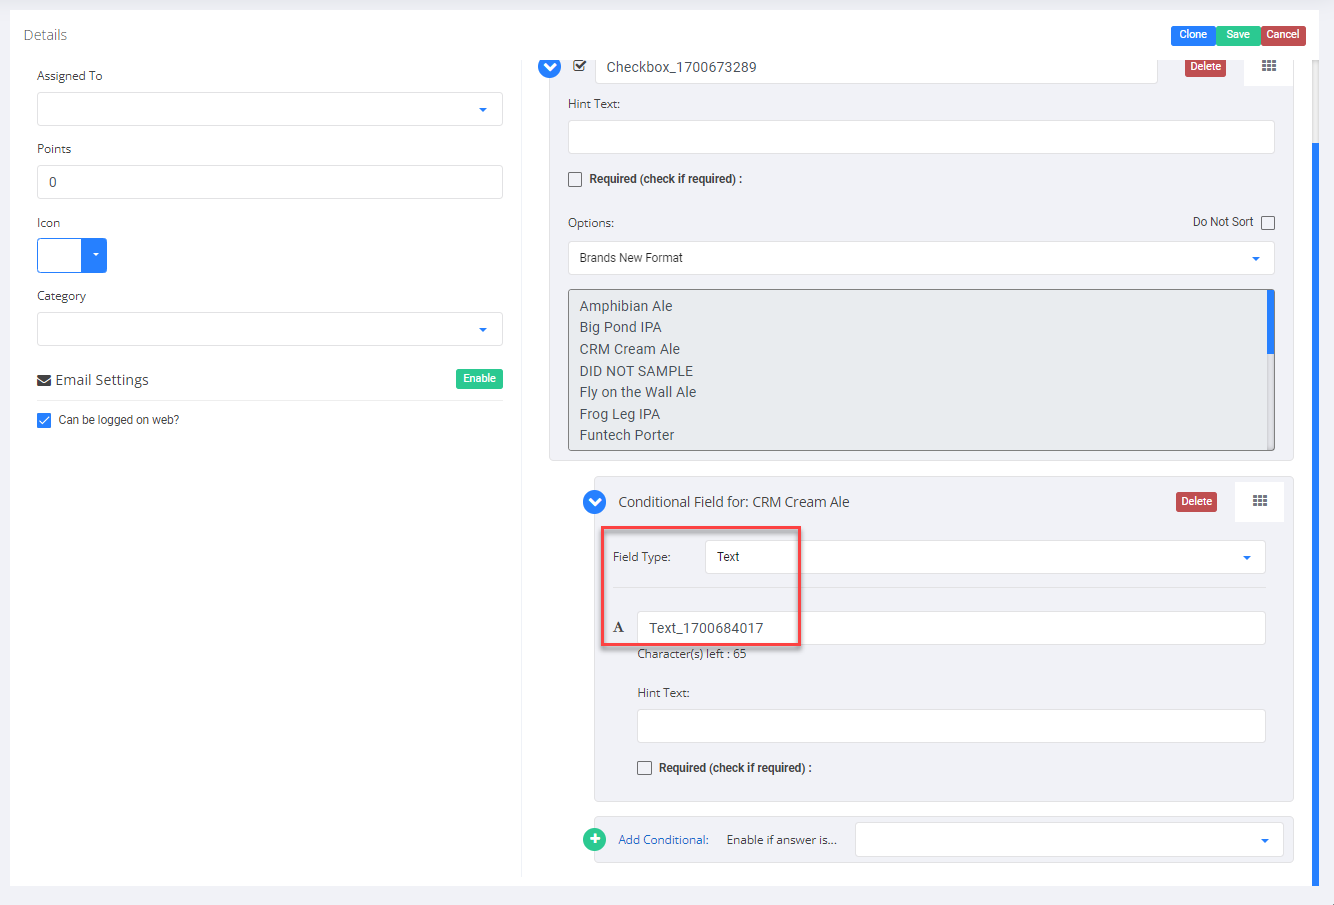
- Select the type of standard form field that the conditional field will appear as.
- Change the title to the question being asked of the sales rep.
- If you'd like, add Hint Text to help guide your sales rep to properly fill in this field. This hint text will appear beneath the question.
- Check the Required (check if needed) box if you'd like for this conditional field to be a required field in the survey.
- **NOTE: If a conditional field is also a Checkbox or Radio field, then they can be used as parent fields to have additional conditional fields expand from them.
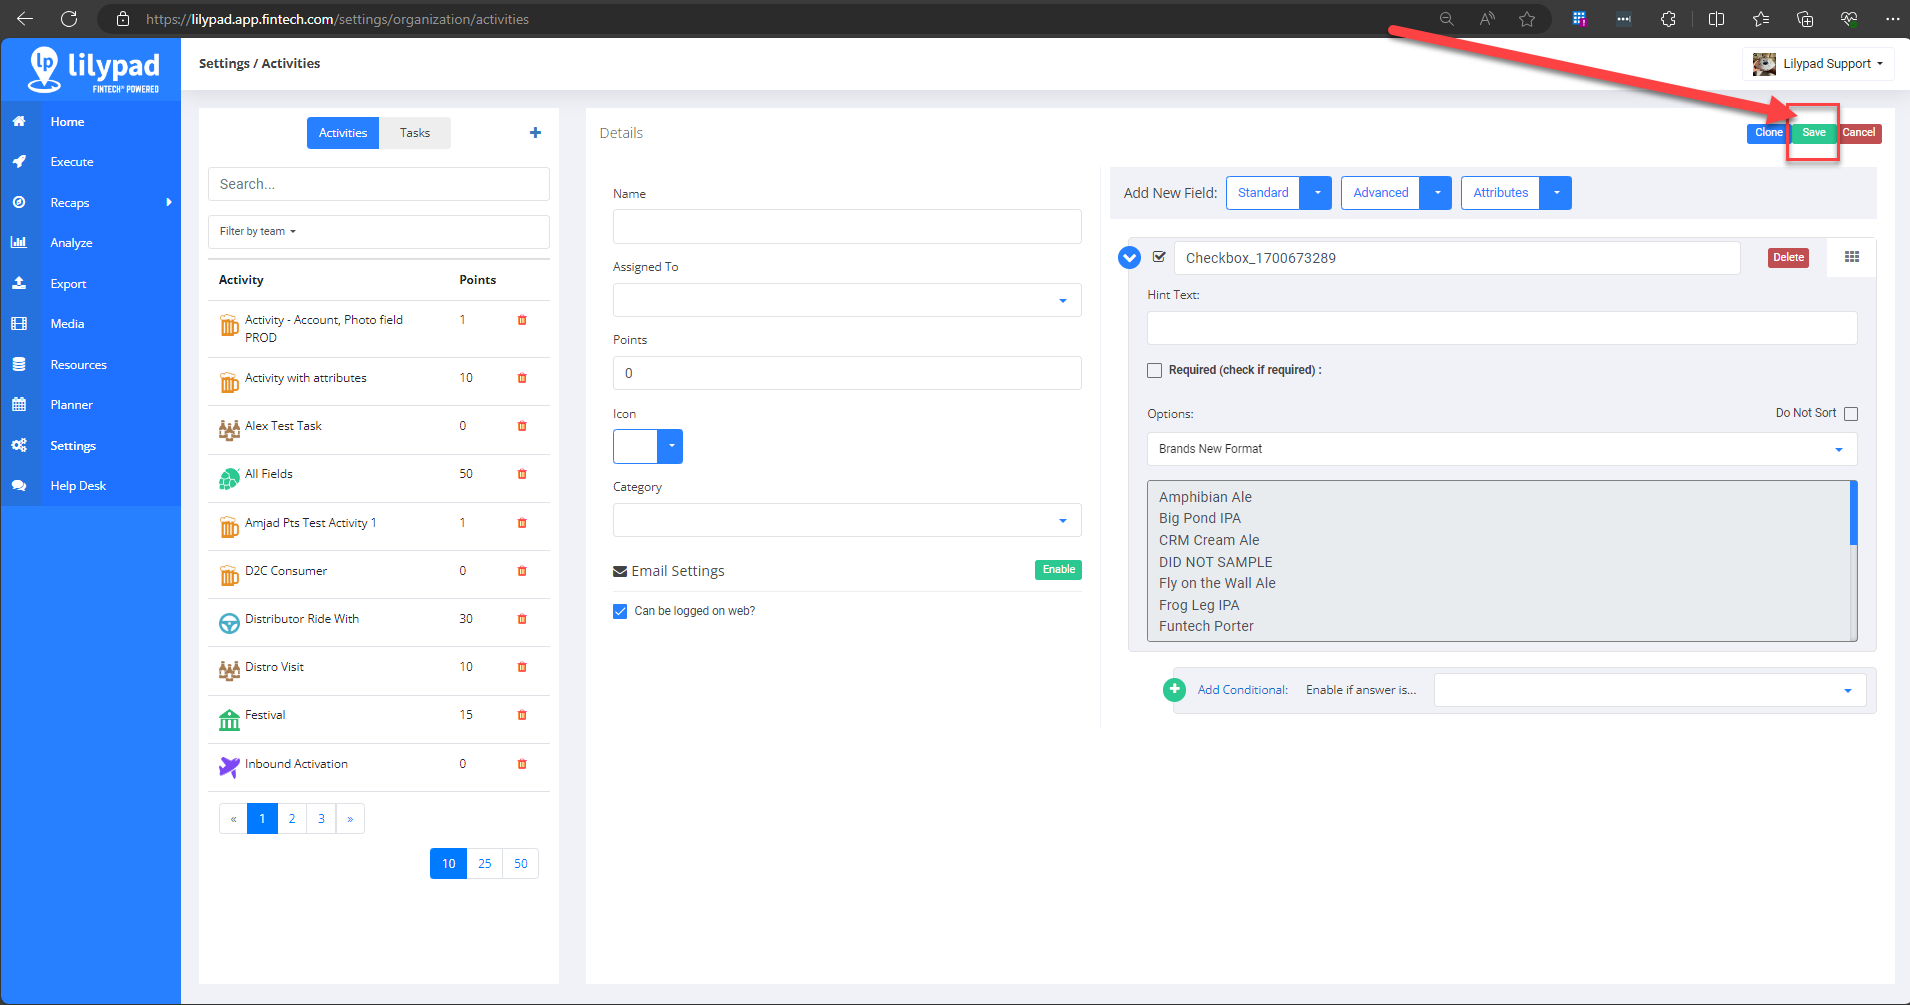
Save Your Work
Be sure to save your activity or task once it's complete by tapping the Save button  in the upper right corner of the screen. Some surveys can be longer than others, especially if you add several Conditional Fields, so be sure to periodically save your work throughout the process of building so that work is not accidentally lost.