Activities/Tasks overview
The Activities and Tasks tabs, found after tapping the Blue Pushpin, contain different surveys created by your Admin/Manager to allow you to log market actions within Lilypad. Activities and Tasks are commonly referred to as "surveys."
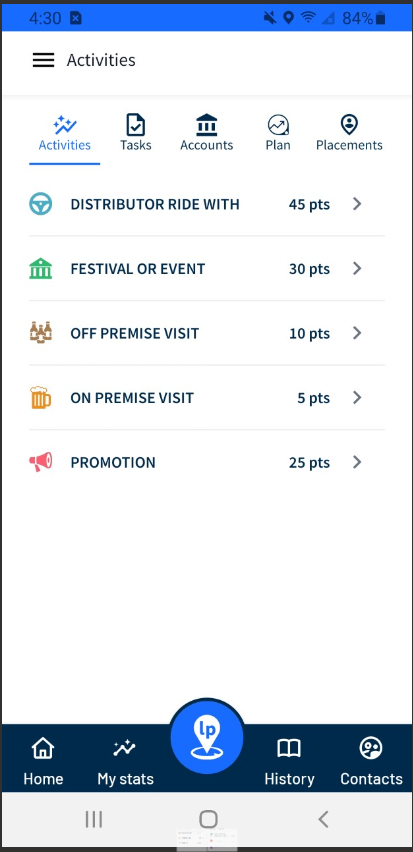
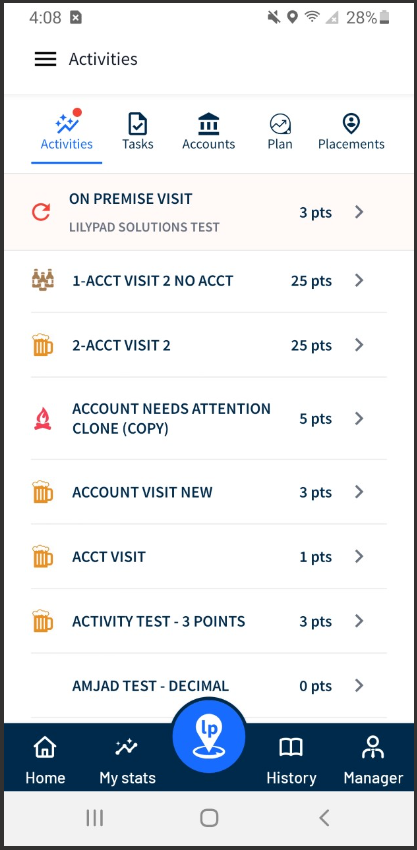
Lilypad has 5 default Activities pre-built for your team when you initially start your instance with Lilypad:
- On Premise Visit
- Off Premise Visit
- Festival or Event
- Promotion
- Distributor Ride With
Admins/Managers can create new or edit existing surveys in the web Settings, and can assign certain ones to each team within your organization. The settings screens for Activities and Tasks have the same layout, so you can categorize them any way you want in order to meet the needs of your organization. See the article below to walk you through these settings:
How To - Create A New Activity or Task - Lilypad
Logging an Activity/Task
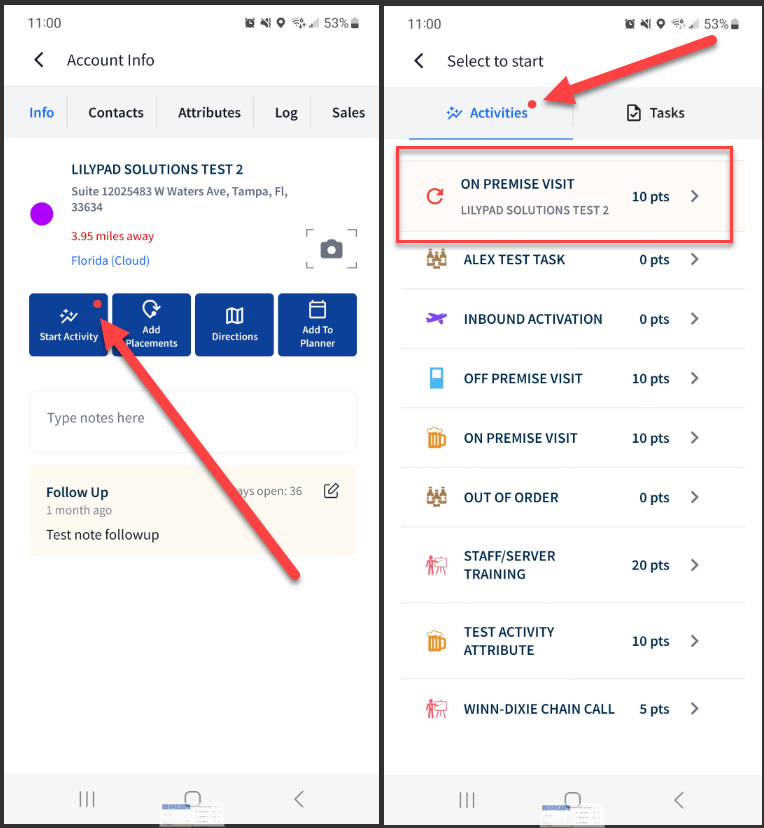
Tap on the Activity or Task you'd like to start.
Choose an Account
If the survey requires an account, then the Account Search screen will appear before you can begin the survey. Use the search field to search accounts in your area. You can search by account name or address. Once you select an account, the survey will open with the account at the top of the screen.
If the survey does not require an account, then you will not see the Account Search screen, and the survey will immediately display. This survey will not have Account Information (address, account contact, distributor contact, etc.).
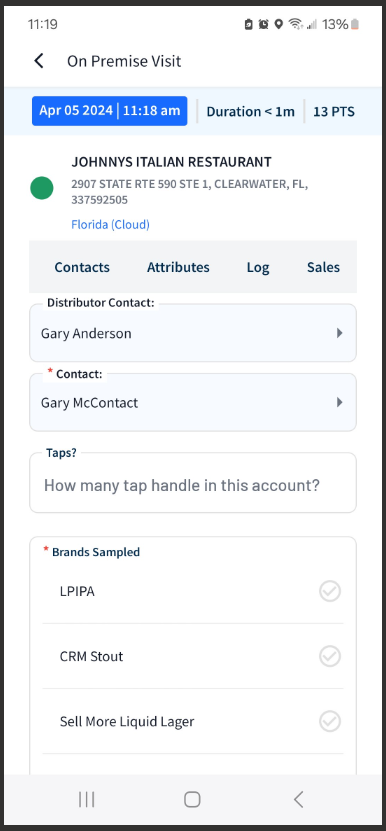
If this Activity is tied to a specific account, then the Account Contact and Distributor Contact will need to be entered. (Unless the organization's team is on Route Mode - then a Distributor Contact will not be required).
**NOTE: Account Contact and Distributor Contact will need to be manually entered by a rep (user) during the first logged entry at an account in the Lilypad app, but will auto-populate on any entry made after the initial entry. If a different contact is selected in a future survey, then the new contact will auto-populate in future surveys for that account. This ideally reflects the contact information for either the buyer or owner at the Account.

If the account cannot be found on the Account Search screen, tap the Add New Account button at the bottom of the screen to manually create a new account. Follow the steps in the doc below to add a new account:
Completing an Activity/Task
Fill out each field (called a Survey Question). Required fields are denoted by an asterisk (*) next to the field title. These asterisked fields must be filled out in order to complete the Activity.
If an account is serviced by more than one distributor, then the distributor name will appear at the top of the activity, task, or placement in BLUE text. Tap on the distributor name to select another distributor. The activity, task, or placement will appear in reports, exports, and recaps under the distributor that was selected when the item was completed.
Done Options
- Done - Tap this button to complete your survey. This will trigger a pop-up message asking if you'd like to Share your survey via email. Sharing is optional. Whether you choose to Share or not, your survey is now saved in the History tab.
-
Edit Start/Finish Time - Tap this button to edit the date and time of the survey. You can set the date and time into the past, and the duration cannot exceed 24 hours.
- **NOTE: These changes are made visible in reports.
- Discard - This button will delete your survey, and it won't save to the History tab.
Sub Navigation buttons
Sub Navigation buttons allow you to quickly view detailed information about the selected account without navigating far from your survey. This information can be viewed while logging the Activity or Task. No matter which button you press, tap the back button in the upper left corner to return to your in-progress survey.
Contacts
The Contacts tab is the only place within Activities and Tasks to edit or remove contact information.
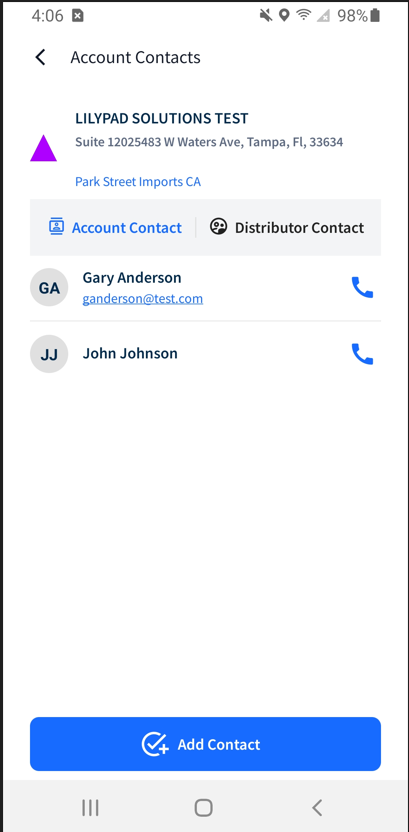
A user can:
- View the contact's name and title.
- Click on the phone icon (if lit in dark blue) to call the contact directly from your mobile device.
- Click on the email address (if one was saved to the contact's profile) to email the contact from your mobile device's default email app.
- Click anywhere else on the contact to open and make changes to the contact.
- Contact fields that can be adjusted are: first name, last name, title, phone number, email address, and any notes that apply to the contact.
- Update Contact button - tap to save changes you've just made.
-
Delete Contact button - tap to delete contact from the account profile page.
- **NOTE: Distributor contacts Suggested from VIP cannot be edited or deleted.
Attributes
In an activity or task, Attributes can be viewed or updated. Attributes pull from the account's profile page, and attribute changes made in a survey will update the account profile page.
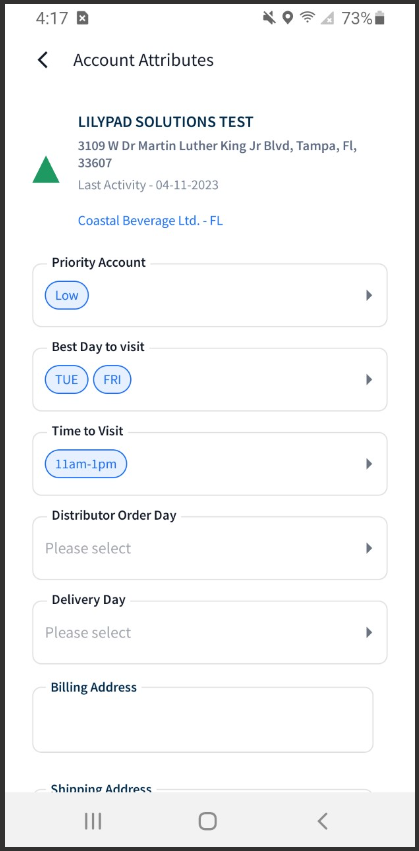
Some attributes are map filterable, such as Best Day To Visit or Best Time To Visit. This means, you can filter account pushpins on the map by certain attributes (as long as they have been selected on various account profile pages).
There are also reports in the web version of Lilypad that use Attributes as filters.
Log
In an activity or task, the Log tab will take you to the same Log tab found in the account's profile page. This is where any previously logged entries (activities, tasks, placements, etc.) for this account can be viewed.
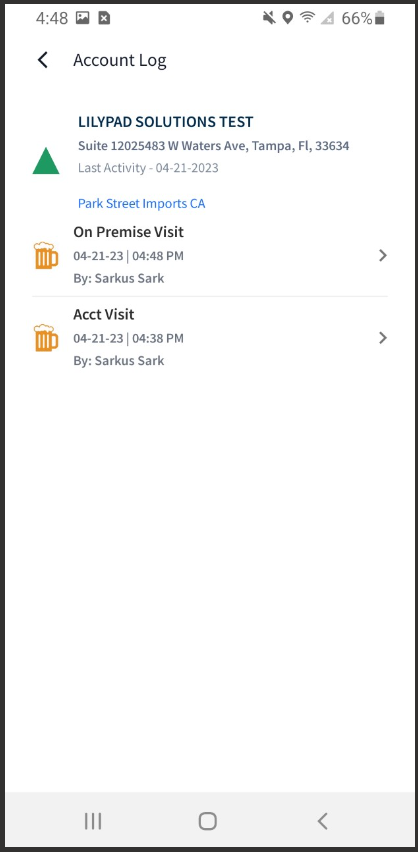
A full list of all entries made for this account will appear, regardless of who has logged an action within this account or how long it has been since that action was logged. Each item in the log will include the type of entry, date, time logged, and name of the person who made the entry.
Sales
The Sales tab in an activity or task will show sales data for the account chosen for the survey and is only available if there is sales data being reported by an integrated data source (examples: VIP, Encompass, LDS Data, etc).
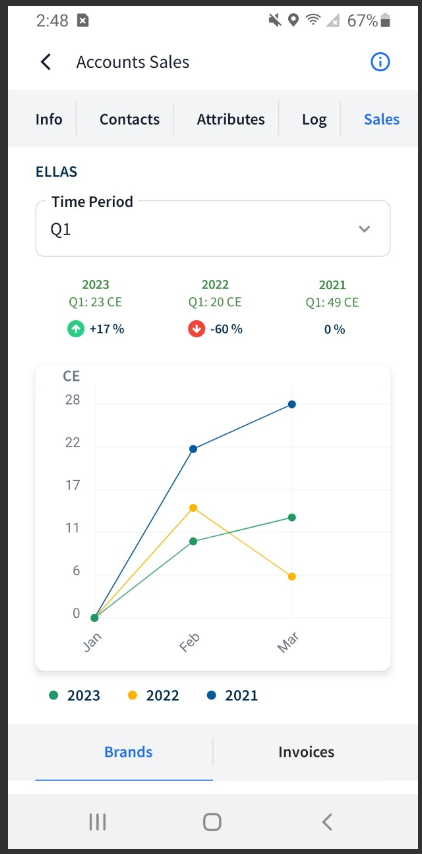
Choose a Time Period for sales comparisons between this year, last year, and the year before (for example, 2023, 2022 and 2021). You have the option to compare by entire year or by quarter.
- The Brands list will show brands sold during the selected time period along with a quick sales comparison to the previous year.
- The Invoices list will show invoices received for SKUs sold to this account for the selected time period.
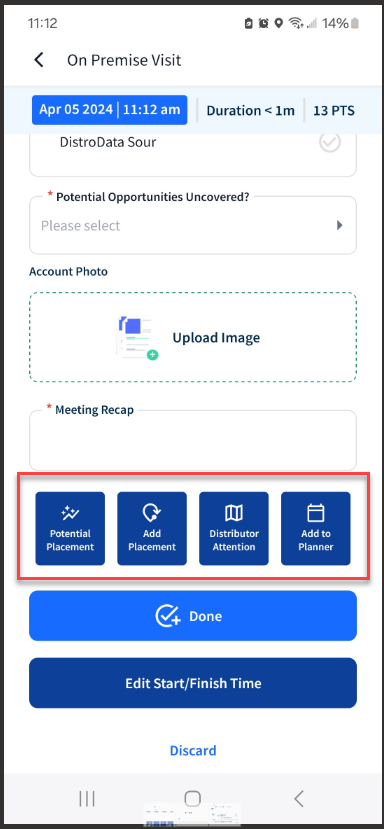
Action Buttons
At the bottom of any activity or task that requires you to choose an account, you will find the following buttons that allow you to complete a quick action that, once completed, will bring you back to your incomplete survey.
- Potential Placement - Allows you to add a Potential Placement note for this account that will be saved under Blue Pushpin > My Lists.
- Add Placement - Allows you to add a Placement for this account that will be saved under Blue Pushpin > Placements > Committed state.
- Distributor Attention - Allows you to add a Distributor Attention note for this account that will be saved under Blue Pushpin > My Lists and within Distributor Recaps under the Action Items tab.
- Add to Planner - Allows you to add a Planner item for this account to your Lilypad calendar.
Logging Two Surveys at Once - Red notification badge indicates an incomplete survey
Start an Activity/Task from Blue Pushpin > Activities or Tasks tabs
If you're in the middle of filling out a survey (for example: an Activity) and need to back out to complete a quick Task, the main Activity tab at the top of the screen will display a red notification badge, and your incomplete activity will be highlighted in red at the top of the list of activities.
After you complete your task, you can tap on the red activity box to complete it later. The same occurs if you start a Task and need to back out to fill out a quick Activity.
Start an Activity/Task from an Account Profile Page
If you begin your survey from the Account Profile Page, and back out of the incomplete survey, you will land back on the Account Profile Page, and a red notification badge will appear on the Start Activity button. Tap here to see a list of available Activities and Tasks for you to choose from. Your incomplete activity or task will be available at the top of the appropriate list in red.